Understanding Motor Vehicle Service Notification

Ever wished your phone could notify you when an appointment is approaching, just like your automobile does? Modern vehicles are becoming more intelligent and capable, thus! Imagine a scenario where your automobile alerts you to the need for an oil change, tyre rotation or regular maintenance by sending you a polite reminder. “Motor vehicle service notifications” are the name of this wonderful function. In this post, we’ll explain what these notifications are, how they function, and why they’re so important for maintaining the safety and efficiency of your car.

Explain Motor Vehicle Service Notification

Autonomous alerts or reminders are known as motor vehicle service notifications. This message is delivered by your car to let you know when maintenance is due. Additionally, if there are any possible problems. These messages help you stay abreast of your car’s health and maintenance requirements, just like your phone does when it reminds you of appointments.

It is impossible to stress the importance of motor vehicle service notices. They aid in preventing minor issues from developing into significant and pricey fixes. Your automobile will operate efficiently and safely with regular maintenance such as brake inspections and oil changes. Therefore, by getting regular notifications, you can plan maintenance at the proper intervals.

This not only extends the lifespan of your car but also improves fuel efficiency and lowers emissions, helping to protect the environment. Motor vehicle service notifications are an essential element in today’s increasingly intelligent and connected automotive environment because they are essentially your car’s method of watching out for you and its own well-being.

How Do The Notification Work?

Modern vehicles come with cutting-edge sensors and diagnostic tools. However, that keeps an eye on a variety of internal systems and components. These sensors monitor a variety of things, including engine performance, tyre pressure, and oil quality. The vehicle’s onboard computer sends out a message when it identifies a potential problem or determines that it is due for routine maintenance.

Depending on the technology in the car and your choices, these notifications may come in a variety of formats, including dashboard lights, messages on your infotainment screen, emails, and mobile app alerts.

Reasons Why Motor Vehicle Service Notification Occurs?

Have you ever been driving your car when all of a sudden a dashboard light or message appears? Those notifications are your car’s method of communicating with you, which may seem strange. Your body sends signals when it needs something, and your car does the same. We’ll now look at the typical reasons for motor vehicle service notifications.

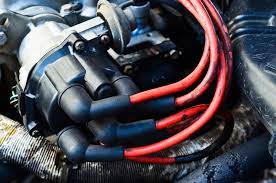
1. Engine Check Light:

When something goes wrong under the hood of your car, the check engine light will illuminate. A loose gas cap or a more serious engine issue could be the only problems.

2. Reminder About Oil Changes:

Your car needs an oil change, as this notification serves as a reminder. Regular oil changes are essential for maintaining the health of your car’s engine parts.

3. Braking System Alert:

If you notice this warning, your car’s brakes are malfunctioning. Safety depends on brakes, thus it’s critical to address this problem right away.

4. Warning About Tyre Pressure:

When one or more tyres have excessively low or excessively high air pressure, this notice will show. Safe handling is ensured by proper tyre pressure and good fuel efficiency.

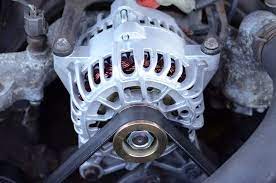
5. Battery Condition:

A battery alert lets you know that there could be a problem with the battery or charging system in your car. You can end up stranded if you ignore it.

6. Reminder For Service Interval:

This message informs you that your automobile needs routine maintenance, such as an oil change, filter replacement, or general inspection. Maintaining these procedures increases the lifespan of your vehicle.

7. Transfer Case Issues:

Gear issues might cause your car’s gearbox to malfunction. This needs to be taken care of right away because putting it off could result in expensive repairs.

8. Notice About Coolant Temperature:

Keep the engine in your car at the proper temperature. Engine damage may result if it becomes overheated. This notice informs you of issues with your cooling system.

9. Airbag System Warning:

Your airbags are crucial for crash safety. If you notice this indication, there may be an airbag system problem that requires care.

10. Anti-Lock Braking System Warning:

When stopping suddenly, the ABS system aids in maintaining control. An issue with this important safety feature is indicated by this message.

Solutions To Fix The Notification

Your automobile is a reliable travel companion, but it occasionally requires some tender loving care much like any friend. Don’t worry if your car notifies you that it needs maintenance. To assist you comprehend and resolve it, we provide a step-by-step manual.

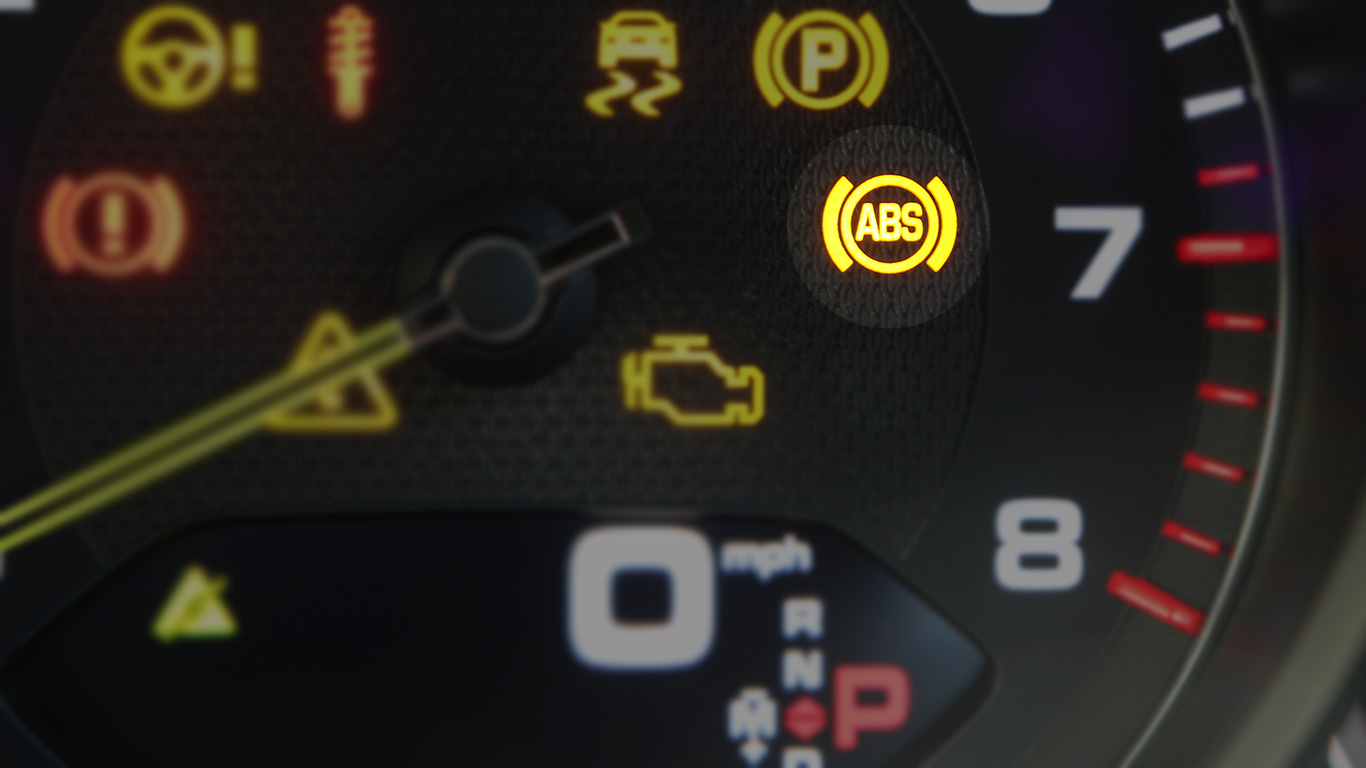
Step 1: Focus On The Warning Light

Your car is attempting to communicate with you when it flashes a warning light on the dashboard. Check your owner’s manual to determine the precise problem as these lights can differ. Greater issues may result if you ignore them.

What do all your car's dashboard warning lights mean?

Step 2: Examine The Gauges

Instead of warning lights, some cars use gauges. It’s imperative that you act if you detect any odd data, such as an elevated engine temperature or low oil pressure.

Step 3: Consult The Owner’s Manual

The owner’s manual for your car is a wealth of knowledge. Look for the section on warning gauges or lights. Each one’s significance and what you should do when it starts will be explained.

Step 4: Determine The Problem

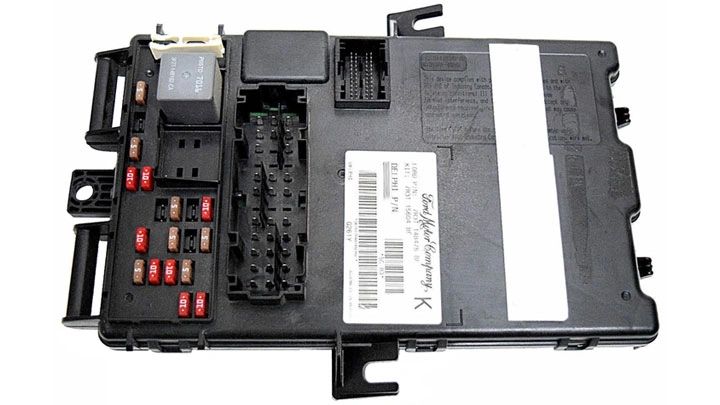
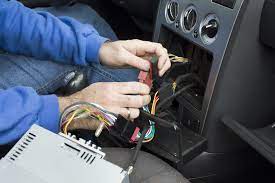
If the explanation in the manual isn’t clear, think about purchasing an OBD-II scanner. To read trouble codes, plug it into your car’s port (often located beneath the dashboard). These codes can identify the issue.

Motor Vehicle Service Notification: Everything About It

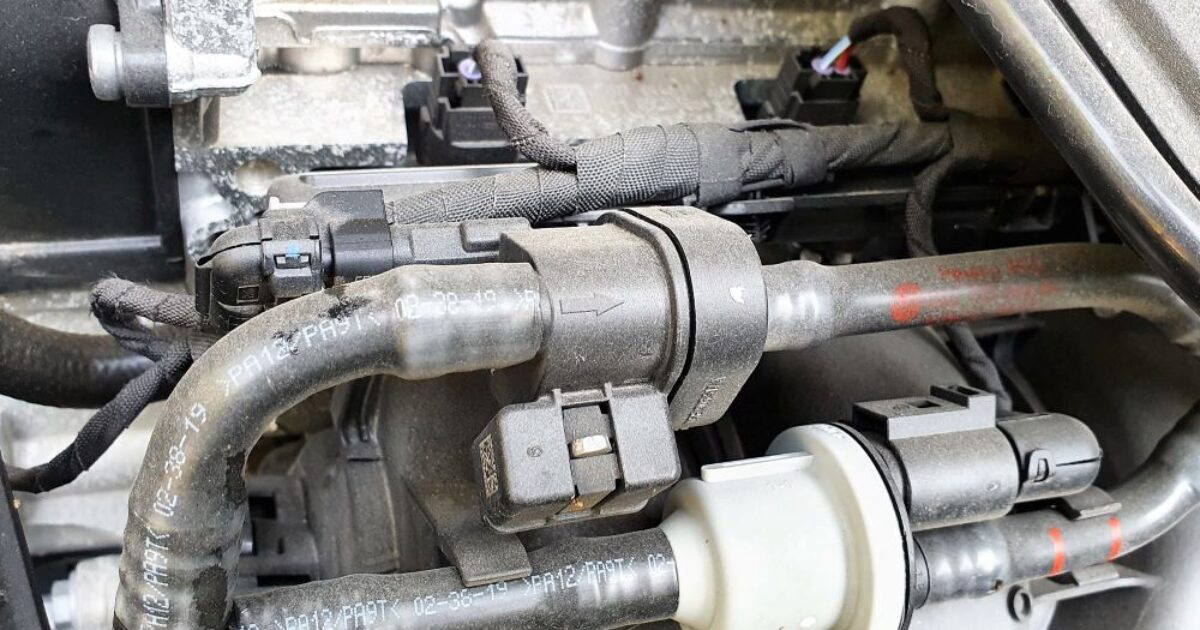
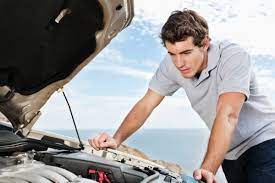
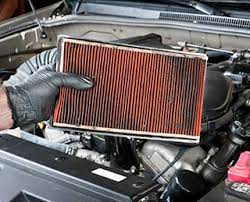
Step 5: Check Fluid Levels

Service notifications may be triggered by low coolant, oil, or other vital fluids. Examine the levels by opening the hood. If necessary, top them off, but take care not to overfill.

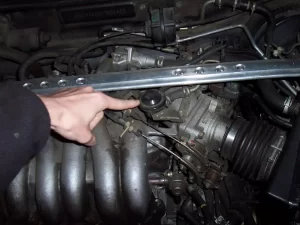
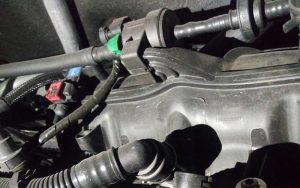
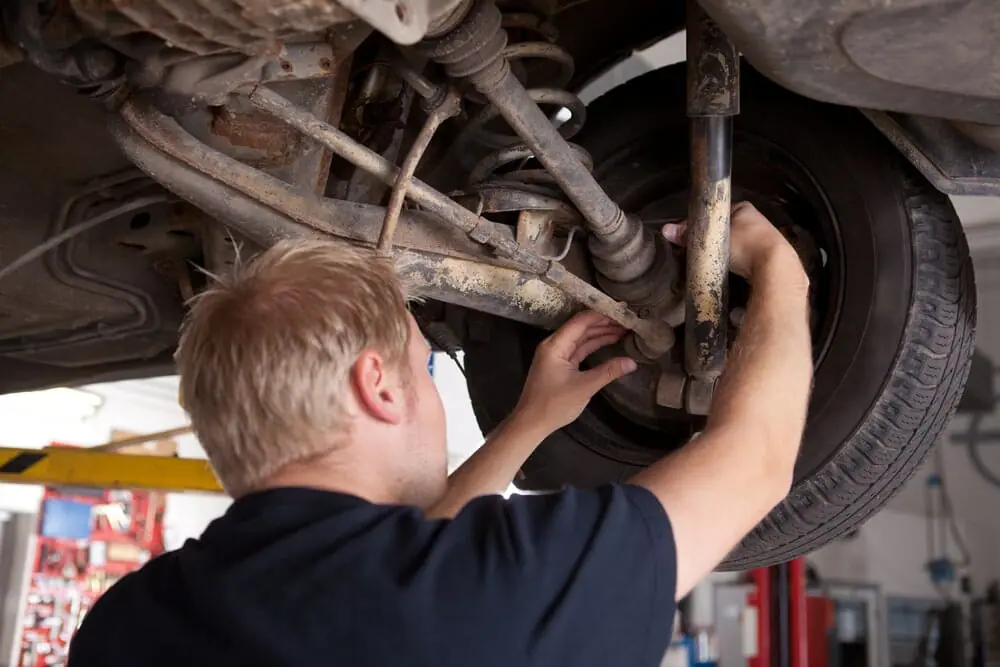
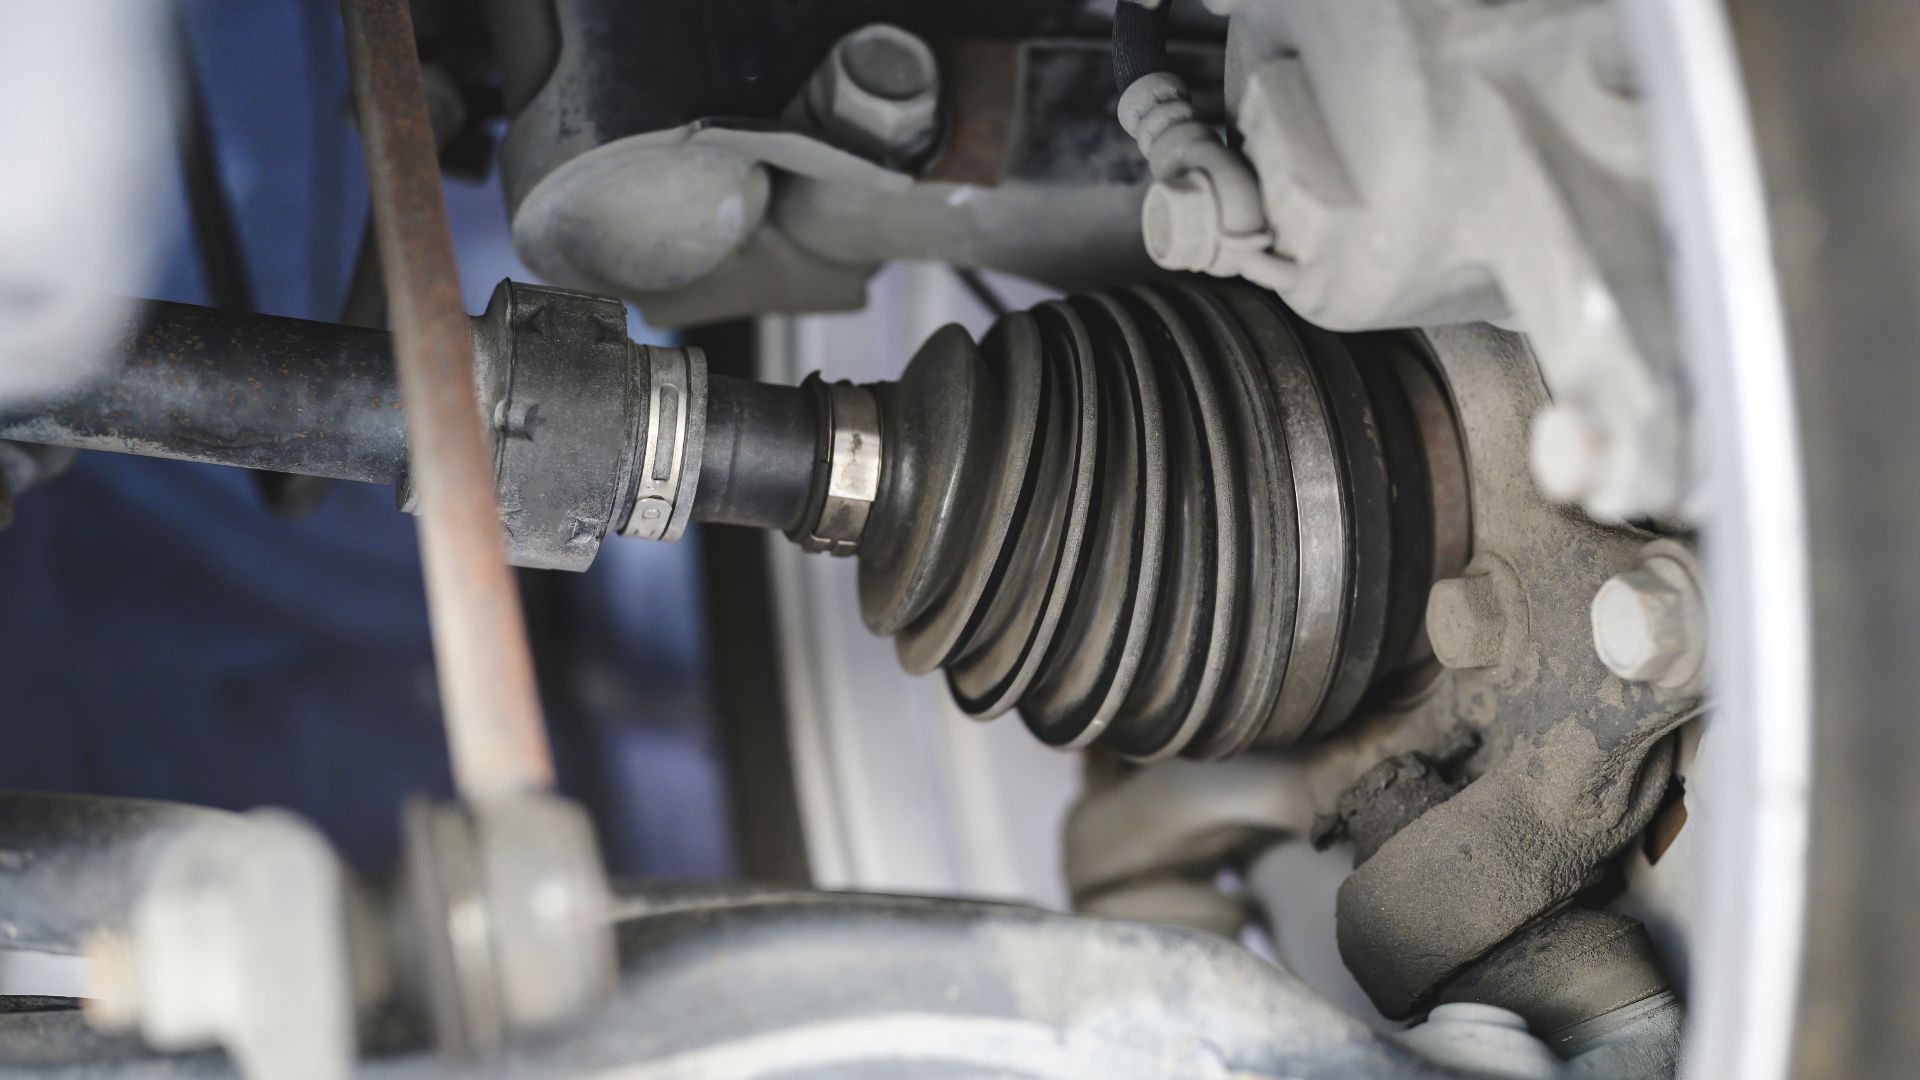
Step 6: Check For Visible Damage

Check the car’s undercarriage for any obvious dents, leaks or loose parts. Warning lights may occasionally turn on due to a loose gas cap or a broken hose.

Step 7: Screw The Gas Cap Tight

The “Check Engine” light may come on because of a loose gas cap. To see if the light turns off, make sure it is tight and stable.

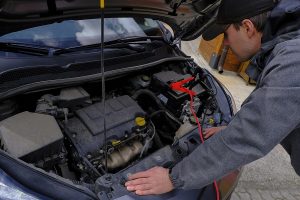
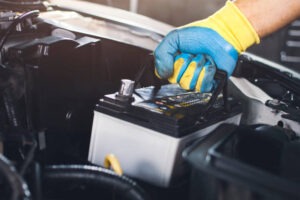
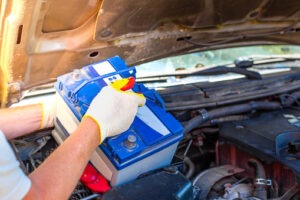
Step 8: Unplug The Battery

Disconnect the battery of the automobile for around 15 minutes if the warning lights continue to come on. In addition to resetting the system, this may also turn off various warning lights. But if the issue continues, get expert assistance.

Step 9: Look For Expert Assistance

After trying these fixes, if the issue or warning light still exists, it’s time to speak with a mechanic. They are qualified and equipped to identify and address more complicated issues.

Step 10: Consistent Upkeep

The best treatment is prevention. Follow the recommended maintenance schedule for your vehicle, which should include regular inspections, filter replacements, and oil changes. This can initially stop a lot of service notifications.

Repairing Cost To Fix The Notification

Your car’s motor vehicle service notice repair cost may differ significantly depending on a number of variables. Fixing minor problems like a gas cap that is loose or low fluid levels could just cost a few bucks. The cost of more complicated issues, such as a broken sensor or defective part, can run from $100 to $1,000 or more.

There can be diagnostic charges, which normally range from $50 to $100. Regular maintenance charges, such as oil changes and filter replacements, which normally range from $50 to $100, are necessary to avoid such notices. A reliable mechanic should be consulted for a precise quote depending on the details of your particular car and problem.

Conclusion:

Do not allow the motor vehicle service notification to stress you out. You can find the problem and sometimes cure it by understanding the warning gauges or lights and by taking these easy actions. To keep your automobile running smoothly on the road, always remember that it’s a good idea to seek professional assistance when in doubt. We sincerely hope the above-mentioned information will be helpful to all the viewers. Additionally, if anyone faces any doubts feel free to contact us. Thank you for reading!

CV Joint Noise When Driving Straight: Unveiling Causes And Fixes

Have you ever been travelling down a straight road in your automobile when you suddenly heard odd noises coming from underneath? It can be really unpleasant and alarming. A broken CV joint is one of the frequent causes of these disturbing noises. We’ll explain what does CV joint mean in a car, why a CV joint noise when driving straight in this post, and what you can do to fix the problem.

Explain CV Joint In A Car

Constant Velocity joints, or CV joints, are flexible hinges on automobiles. Consider the axle as a long metal stick through which the engine of your car transfers power to the wheels. WhyThe trouble is, though, as you drive over bumps, your wheels need to go up and down. The CV joint is used in this situation.

The junction that joins the axle to the wheel is akin to a mystical one. Even when the axle is kept straight, this joint enables the wheel to rotate while also allowing for smooth up-and-down motion.

Why CV Joint Is Important?

However, when you steer, your wheels need to turn occasionally rather than always moving in a straight line. Your wheels can do it without breaking anything thanks to the CV joint. Imagine driving without CV joints, your automobile would make terrible noises every time you turned, and you might shatter a wheel when you encountered a bump.

Therefore, these little joints are like the superhumans of a safe and comfortable trip. Every time you drive, they’re working hard to keep your car moving and your wheels from breaking, no matter how choppy the road is.

Why Does CV Joint Noise When Driving Straight?

The CV joints should typically be silent when you’re travelling straight on a smooth road. However, a number of problems could be the reason they create noise:

1. CV Joints That Are Worn Out Or Damaged:

The usual use of CV joints or harm from road debris might cause them to wear down over time. When you drive straight, they may make a popping or clicking noise if they are damaged.

2. Insufficient Lubrication:

For CV joints to work properly, lubrication is necessary. The metal components of the joint may rub against one another and create noise if the grease inside the joint dries out or spills out.

CV joint noise when driving straight — cause and fixes | REREV

3. CV Joint Boot Torn:

There is a rubber boot covering the CV joint. If this boot breaks, debris and moisture could get inside the joint, accelerating wear and creating noise.

4. Misaligned Axles:

If the axle is not properly aligned, the CV joints may be subjected to additional stress, which can cause noise.

Therefore, these are some common causes behind the CV joint noise when driving straight. Additionally, you need to refer to our full article to learn its fixes.

Tips To Fix The CV Joint Noise Issue

To prevent further damage and protect your safety on the road, it’s critical to remedy the issue as soon as you notice noise coming from your CV joints when driving straight. You can take the following actions:

1. Examine The CV Joints:

Examine the CV joint boots visually for rips or other flaws. If you notice any problems, the joint may need to be replaced.

2. Examine For Grease Leaks:

Check the area around the CV joints for grease leakage indications. Grease is a sign that the joint requires repair, so look for it.

3. Take Notice Of The Noise:

The type of noise your car is creating should be noted. A prominent indication of a CV joint issue is a popping or clicking sound made when turning.

CV Joint Noise While Driving? [Here's Why & How To Fix] - Auto Chimps

4. Check With A Mechanic:

It is always preferable to seek the advice of a skilled technician if you are unsure of the issue or lack the necessary tools and knowledge to resolve it. They are able to identify the problem and suggest the required fixes.

CV Joint Noise When Driving Straight - Possible Causes And Fixes

Therefore, these are some basic steps to fix the CV joint noise when driving straight. You need to follow the steps properly or you can consult a mechanic for the same.

Repairing Cost To Fix CV Joint Noise Of Car

The price of fixing CV joint noise might vary based on a number of things, including the make and model of your car, local labour costs, and the severity of the damage. Replacement costs for CV joints can range from $150 to $400 on average. It can cost between $50 and $100 for each boot if the problem is discovered early and the CV joint boot just needs to be replaced.

Frequently Asked Questions

Now that after covering all the aspects of the topic. Therefore, now let’s delve into some FAQs to gain more insights about the topic.

CV Joints - Mr. Transmission - Milex Complete Auto Care - Cary #585

1. What Noise Does A CV Joint Make?

Ans. When you’re travelling straight, clicking or popping noises are frequent. When you turn the steering wheel, it can be more obvious.

2. Can I Drive While My CV Joints Are Noisy?

Ans. It is not advised. Ignoring CV joint noise could result in more deterioration or possibly a fractured joint that would leave you stranded. Early repair is safer and more cost-effective.

3. What Can I Do To Stop CV Joint Noise?

Ans. The key is routine maintenance. Make sure the CV joint boots are properly greased and watch out for any tears. Get any noises or problems looked out right away and remedied.

Conclusion:

In conclusion, you shouldn’t overlook CV joint noise when driving straight. These noises may indicate prospective difficulties that, if ignored, might develop into more serious and expensive problems. Your automobile can be kept running smoothly and safely on the road with routine maintenance and prompt action if you hear any strange noises. Now, that we’ve covered all the aspects of your query. We hope the above-mentioned information will be helpful to all the viewers. Additionally, if anyone faces any doubts feel free to contact us. Thank you for reading!

Step-By-Step Guide: How To Clean Purge Solenoid Valve?

The engine of your car is a complicated machine that needs several parts to function properly. The purge solenoid valve is an essential component of the engine’s emissions management system. This valve may gradually fill with dirt and debris, which will affect engine performance and raise emissions. This article will walk you through the straightforward procedure of how to clean purge solenoid valve in your car, preserving the economy of your vehicle and contributing to a cleaner environment.

Explain Purge Solenoid Valve

A car’s purge solenoid valve is a tiny but crucial component of the engine’s emissions management system. As a large breathing machine, visualise the engine of your car. It inhales fuel and air, burns them, and then exhales the byproducts as exhaust gases. Now, occasionally, it’s necessary to control fuel vapours to prevent pollution from occurring when they escape into the atmosphere. The purge solenoid valve comes into play here. It acts as a sort of gatekeeper for these vapours.

How Does Purge Solenoid Valve Work?

A canister that stores fuel vapours is opened when your automobile is operating. These vapours are allowed to enter the engine’s intake manifold when the purge solenoid valve opens. By assisting the engine in burning them up, hazardous emissions are decreased, and fuel economy is increased.

To help your automobile run cleaner and more effectively, think of the purge solenoid valve as a traffic officer for gasoline vapours, making sure they go where they’re supposed to. For the health of your car and the environment, it is crucial to keep it clean and functioning correctly because if it becomes blocked or dirty, problems may result.

Common Causes Of Dirty Purge Solenoid Valve

There are a few straightforward reasons why a car’s purge solenoid valve could get dirty:

1. Dirt And Dust:

Cars are subjected to the outside environment, which is made up of dirt, dust, and other small particles. Over time, some of this debris may find its way into the valve, dirtying it.

2. Fuel Residue:

On occasion, minute fuel particles may manage to escape from the engine and enter the valve. Fuel can evaporate into petrol, and some of it passes through the valve, causing this to occur.

3. Oil Vapours:

Your engine also creates oil vapours, and with time, these vapours can get inside the valve and contaminate it.

4. Normal Wear And Tear:

As your car operates, certain parts may gradually deteriorate, which may result in a few small pieces of debris.

Therefore, these are some common causes of the bad purge solenoid and valve. You need to follow our full article, additionally, to learn how to clean purge solenoid valve in your car.

How To Clean Purge Solenoid Valve?

Gather the following equipment and supplies before you begin cleaning the purge solenoid valve on your car:

  • Wrench or socket set
  • Screwdriver
  • Pliers
  • A clean cloth
  • A can of electronic contact cleaner
  • Safety goggles and gloves

Step-by-Step Cleaning Guide:

Therefore, so that now you have everything, so let’s begin:

Step 1: Safety First

The greatest focus is safety. Ensure that the engine is off, the key is not in the ignition, and your car is parked on a level surface. To safeguard your hands and eyes when cleaning, put on safety goggles and gloves.

Step 2: Locate The Purge Solenoid Valve

Find the purge solenoid valve by lifting the hood of your car. It usually takes the form of a little cylindrical or rectangular part that is attached to the engine’s intake manifold or close to the firewall.

Step 3: Disconnect The Electrical Connector

To gently detach the electrical connector from the purge solenoid valve, use pliers or your fingers. Take care not to harm the connector or wires.

Step 4: Take The Valve Out

To remove the bolts or nuts holding the purge solenoid valve to the car, use a wrench or socket set. Pull the valve carefully away from its mounting bracket once it is free.

Evap purge valve clean-out and testing

Step 5: Clean The Valve

Clean the ports and openings of the valve with an electrical contact cleaner. This will aid in dissolving and getting rid of any dirt, carbon buildup, or debris that might be resulting in the valve acting up. Wipe away any extra residue with a clean cloth.

Evap purge valve clean-out and testing

Step 6: Reinstall The Valve

Use the wrench or socket set to reattach the valve to the mounting bracket once it has been thoroughly cleaned and dried. Ensure that it is firmly attached.

Step 7: Reconnect The Electrical Connector

The purge solenoid valve electrical connector should be carefully reconnected until it clicks into place.

Step 8: Check The Engine

Start the engine of your car and listen for any odd noises or problems. Your purge solenoid valve has been successfully cleaned if everything feels and sounds normal.

Repairing Cost To Fix The Dirty Purge Solenoid Valve

Including materials and labour, repairing a malfunctioning purge solenoid valve in an automobile normally costs $50 to $200. The precise price may vary based on the make and model of your car as well as the location of the repair shop. Some people opt to change the valve on their own, which can save labour costs but may need purchasing tools if you don’t already have them. To preserve your car’s performance and lower emissions, it’s critical to replace a dirty or broken purge solenoid valve right away. For a specific quote, always verify with your neighbourhood mechanic or auto repair shop.

Frequently Asked Questions

Now that we’ve covered all the aspects of the topic how to clean purge solenoid valve in your car. Therefore, now let’s delve into some FAQs to gain more insights about the topic.

1. Why Does My Car’s Purge Solenoid Valve Accumulate Dirt?

Ans. Being exposed to fuel system vapours causes the purge solenoid valve to become soiled. It may become clogged over time by dirt and debris from the engine and surroundings.

2. How Can I Tell Whether A Purge Solenoid Valve Is Dirty?

Ans. Poor gas mileage, difficult idling, and increased emissions can be caused by a dirty valve. Checking and cleaning the valve is a good idea if your car exhibits these symptoms.

3. How Frequently Should I Clean My Car’s Purge Solenoid Valve?

Ans. A reasonable rule of thumb is to inspect and clean it every 30,000 miles or as instructed in your car’s care handbook. Cleaning intervals can vary, but this is a good starting point.

Conclusion:

Therefore, if you’re wondering how to clean purge solenoid valve in your car. Moreover, refer to our article in detail to gain more insights. The purge solenoid valve on your car can be easily cleaned, which can improve engine efficiency and cut emissions. You can perform this maintenance procedure by yourself with the correct tools and a little perseverance to keep your car in good working order. To keep your automobile in great shape and help the environment, remember to undertake this cleaning regularly.

Now, that we’ve covered all the aspects of your query. We hope the above-mentioned information will be helpful to all the viewers. Additionally, if anyone faces any doubts feel free to contact us. Thank you for reading!

Can A Catalytic Converter Unclog Itself? [Explained]

Modern autos must include catalytic converters because they reduce harmful emissions by transforming poisonous gases into less damaging ones. However, over time, these converters may clog, reducing their effectiveness and having an effect on the performance of the vehicle. The topic of whether a catalytic converter can possibly unclog itself is one that car owners frequently have. This post will explore this intriguing automotive myth, can a catalytic converter unclog itself and will also reveal its debunking. Is it just wishful thinking, or does a catalytic converter genuinely have the ability to self-clear? Let’s investigate.

What Is A Catalytic Converter In A Car?

It’s crucial to comprehend what a catalytic converter is and what it accomplishes in a car before getting into the topic of self-unclogging. An emissions-controlling device built into a car’s exhaust system is a catalytic converter. Its main objective is to lessen the harmful emissions, notably carbon monoxide (CO), nitrogen oxides (NOx), and hydrocarbons (HC), that are released from the engine.

A catalyst, often made of pricey metals like platinum, palladium, and rhodium, is a component of the catalytic converter. These toxic pollutants are changed into less damaging ones when exhaust gases travel through the catalyst in a chemical reaction. Nitrogen oxides are changed into nitrogen and oxygen, carbon monoxide is changed into carbon dioxide (CO2), and hydrocarbons are changed into water vapour and carbon dioxide by oxidation. In order to meet strict emissions regulations and lessen the impact of automobiles on the environment, this technique is essential.

Why Does Catalytic Converter Become Clogged?

Catalytic converters can clog over time for a number of reasons, including:

1. Carbon Buildup:

The buildup of carbon deposits on the catalyst’s surface is one of the main causes of clogging. If the engine runs too richly, using too much fuel, or if the converter is exposed to oil or coolant leaks, this accumulation may occur.

2. Contaminants:

The catalytic converter can be harmed by contaminants such as silicon from a failed oxygen sensor or lead from petrol that contains lead.

3. Physical Damage:

The converter may sustain physical damage from collisions or road debris, additionally, which lowers its efficiency.

4. Age And Wear:

The catalyst’s effectiveness might deteriorate gradually with time, moreover, resulting in a decline in performance.

5. Misfires:

Unburned fuel can enter the exhaust system by often misfiring engines, however, it can lead to overheating and damage to the converter.

Can A Catalytic Converter Unclog Itself?

Although catalytic converters are strong and can withstand some wear and tear, they cannot clear clogs on their own. The converter’s efficiency drastically declines after becoming blocked, which has an impact on the vehicle’s performance and emissions.

It’s a common fallacy that driving quickly will clear a clogged converter and burn off carbon deposits. Aggressive driving won’t work as a dependable or long-term remedy, while it might momentarily lessen some buildup.

Addressing Catalytic Converter Issues

To prevent further harm to your car and lessen your influence on the environment, you must act quickly if you believe that your catalytic converter is clogged or not working properly. Here are some steps to think about:

1. Diagnostic Check:

Have your car’s exhaust system checked out by a licenced mechanic or auto repair facility. Therefore, to evaluate the converter’s effectiveness, they can make use of specialised equipment.

How To Fix A Clogged Up Catalytic Converter – AutoVfix.com

2. Repair Or Replacement:

Additionally, your mechanic may advise cleaning the converter or replacing it, moreover, depending on the seriousness of the problem. Frequently, severe obstructions need to be replaced.

3. Fix Underlying Issues:

Take care of any underlying problems that may have contributed to the obstruction, such as repairing leaks, changing the air-fuel ratio, or addressing engine misfires.

4. Regular Maintenance:

However, to avoid clogs in the future, maintain your car regularly. This includes doing regular oil changes, changing your air filter, and inspecting your oxygen sensor.

Frequently Asked Questions:

Till now, we’ve covered all the important aspects of the topic and now let’s delve into some amazing FAQs to gain more insights into the topic.

Can A Catalytic Converter Unclog Itself? - Carsneedcare

1. Can a catalytic converter that is blocked clear itself?

Ans. No, a catalytic converter that is blocked cannot clear itself. To return it to its proper state, action is necessary.

2. What triggers the clogging of a catalytic converter?

The accumulation of carbon deposits, oil, and other pollutants over time is usually what causes clogging.

3. What signs do a catalytic converter blockage present?

Ans. Reduced engine performance, more fuel consumption, and lit “Check Engine” lights are among the symptoms.

4. How can catalytic converter blockage be avoided?

Ans. Clogs can be avoided through regular maintenance, Additionally, with the use of high-quality gasoline, and rapid repair of engine problems.

5. Can a catalytic converter be cleaned out using additives or gasoline treatments?

Ans. However, additives won’t clear a clogged converter that has already become blocked.

6. How can a blocked catalytic converter be repaired?

The choices for repair include cleaning, replacement, and occasionally removal in places where it’s permitted.

7. Is it safe to drive with a blocked catalytic converter?

Ans. It is unsafe and unsustainable, and over time, however, it could harm your engine.

8. How much does a new catalytic converter cost?

Ans. The price might vary from a few hundred to a few thousand dollars depending on the type of car and the location.

Conclusion:

In conclusion, a catalytic converter is an essential part of an automobile’s exhaust system and is essential for lowering hazardous emissions. Although if you’re wondering can a catalytic converter unclog itself, then, no it cannot unclog itself. Therefore, regular maintenance and taking care of problems as soon as they arise will help prevent clogs and ensure your car operates effectively while reducing its environmental impact. It’s always preferable to visit a skilled mechanic for a professional examination and any necessary repairs or replacements if you suspect a catalytic converter issue.

Now, that we’ve covered all the aspects of your query. We hope the above-mentioned information will be helpful to all the viewers. Additionally, if anyone faces any doubts feel free to contact us. Thank you for reading!

Step-By-Step Guide On Body Control Module Reset

Hello, young car aficionados! Have you ever pondered the mysterious brains that keep your car running smoothly? The Body Control Module (BCM) is one of your car’s brain’s most crucial components. It occasionally needs a minor reset to stay in peak condition. This page will describe what a body control module reset is when one might be necessary, and how to perform one on your own (with some assistance from adults, of course).

The proper running of today’s automobiles depends on a sophisticated communication network. This network is made up of numerous sensors, wires, and terminals that collectively provide feedback to various electronic computer modules. Most often, a controlling computer module is included for each of a car’s essential systems.

What Does Body Control Module Reset Mean?

Resetting the Body Control Module (BCM) of a vehicle is a method used to erase any faults and recorded data. The BCM acts as the brain of your car, managing its many electrical systems, including the lights, power windows, and door locks.

The BCM may occasionally become confused as a result of problems like electrical hiccups or changes in the vehicle’s power source, which can cause problems with various systems. Resetting the BCM allows it to function properly again.

Why Does The Body Control Module Reset Message Occur?

A number of symptoms are connected to body control module dysfunction. In the event that you encounter a fault of this nature in the future, it is crucial to become familiar with each of these symptoms even if some of them are generally far more common than others.

Several of the most typical signs and symptoms of a failing body control module are listed below.

1. Continual Battery Drain:

Repeated, excessive battery drainage, often known as a parasitic draw, is one of the signs of body control module failure that is most frequently experienced. While some parasitic draw is acceptable, excessive draw made possible by a BCM malfunction can quickly drain a battery. This draw happens when a BCM keeps providing power to a certain accessory at the wrong times.


2. Electrical Problems:

A malfunctioning BCM might result in a number of electrical issues. Problems with the HVAC (Heating, Ventilation, and Air Conditioning) system, faulty interior lights, intermittent power window or door lock issues, and unpredictable windscreen wiper behaviour are a few examples. These processes are controlled by the BCM, therefore problems with it may result in inconsistent or dysfunctional operation.

3. Security Error:

The body control module controls a vehicle’s security system virtually always. Therefore, it is simple to conclude that recurring yet mysterious security system problems with vehicles are a result of a broken or malfunctioning body control module. Problems with a vehicle’s keyless entry or passive entry systems can also fall under this category.

4. Warning Lights And Error Messages:

The dashboard may illuminate with a variety of warning lights, including the airbag light, ABS (Anti-lock Braking System) light, check engine light and more. These lights often denote issues with the system. These systems may get the wrong signals from a BCM that is malfunctioning, turning on the warning lights.

5. The Instrument Cluster And Malfunctioning Gauges:

Inaccuracies or outright failures in the speedometer, fuel gauge, and temperature gauge of the car can result from BCM issues. This may make it challenging to keep track of important information while driving.

6. Stalling:

Intermittent stalling while driving or trouble starting the car are also signs of a faulty BCM. This is due to the BCM’s management of essential engine control operations and intersystem communication. When it malfunctions, the engine might not get the signals it needs to function properly.

Therefore, it is advised to get assistance from a trained mechanic or technician to identify and resolve the root cause if you ever notice the message “Body Control Module Reset” on your car’s dashboard.

Step-By-Step Guide On Body Control Module Reset

Important Note: It’s vital to read your car’s owner’s manual and, if at all feasible, obtain advice from a trained repair before performing a BCM reset. Procedures for BCM resets can differ between automobile makes and models.

Step 1: Put Your Safety First

Make sure your car is parked safely, and that the engine is off, as well as look if the key is out of the ignition. Your main priority should be always safety first.

Step 2: If Necessary, Disconnect The Battery

In some circumstances, disconnecting the battery from the vehicle enables a BCM reset. Here’s what to do if you select this approach:

  • Find your vehicle’s battery. Usually, it’s in the trunk or under the hood.
  • Carefully detach the negative (black) battery cable from the battery connector using a wrench or socket set. Moreover, to avoid any electrical accidents, the negative cable must be attached first.
  • Disconnect the cable and wait 15 to 30 minutes. However, this will enable the electrical system of the automobile to drain any remaining power, thereby resetting the BCM.
  • Reconnect the negative battery cable to its terminal following the waiting period. Ensure that it is safe.

Step 3: Wait For The BCM Reset

You must wait for the BCM to reset itself after reconnecting the battery or after following the suggested process in your car’s owner’s handbook. Normally, this takes a few minutes. Avoid starting the car or using any electrical devices during this time.

Step 4: Reconnect The Battery (If It Has Been Detached)

Carefully reattach the positive (red) battery cable to its terminal if you detached the battery.

Step 5: Start The Vehicle

Don’t start the engine after turning the ignition key to the “On” position. Additionally, permit the systems of the car to start up. You might notice lights flashing on and off or hear clicks. That is typical.

Step 6: Test the Affected Systems:

After the BCM has been reset, test the systems that were previously acting strangely. Verify the functionality of your lights, power windows, door locks, and any other BCM-controlled features.

Step 7: Clear Error Codes (If Necessary)

Consider utilising an OBD-II scan tool to clear any error codes or warning lights on your dashboard if they were there before the reset. This process can ensure that any errors that were previously saved in the computer system of the car are cleared out.

Step 8: Keep An Eye Out For Repetition

Over the next few days, keep an eye on the systems in your car. If the problems persist, there may be an underlying issue that requires expert intervention.

Therefore, these are some important steps through which you can easily reset your car’s body control module. Always exercise caution when doing a BCM reset, and if you have any questions about the process, it’s a good idea to ask a competent mechanic for assistance. Car electrical systems can be complicated, and poor management could result in further problems.

Repairing Cost To Reset BCM

Each brand and model of car has a unique price for replacing the body control module. This is due to the fact that different body control modules have different costs and labour costs connected with their replacement. However, the average cost of replacing a body control module is described in the paragraphs that follow.

What is a Bad Body Control Module (BCM) & Symptoms of Bad BCM?

Replacement of a body control module typically costs between $300 and $600. The real cost of the failing module itself is the main determinant of this pricing. Due to a slight problem with module availability at the moment, shipping expenses related to finding and acquiring such modules can also have an impact on the cost of these repairs.

Frequently Asked Questions (FAQs)

Now, that we’ve covered all the important aspects of the topic. Therefore, let’s now delve into some amazing FAQs to gain more knowledge of the topic.

1. Is It Possible For Me To Reset The BCM By Myself?

Ans. Since this includes working with the vehicle’s electrical system, you should always have an adult or qualified professional assist you.

2. How Can I Tell Whether The BCM Has To Be Reset?

Ans. Strange problems, such as lights that don’t work properly, acting-up power windows, or broken door locks, could indicate that the BCM has to be reset.

3. Is Clearing Error Codes The Same As Resetting The BCM?

Ans. Not quite. Some problem codes can be removed by resetting the BCM, but it’s more like starting again.

Conclusion:

Okay, young auto enthusiasts, you now fully understand the Body Control Module Reset and the reasons it may require a reset. Always remember that seeking assistance from knowledgeable people is a smart idea when it comes to autos. And who knows, maybe one day you’ll develop into your own personal auto specialist and assist others with their auto-related problems! Therefore, the next time your automobile starts acting strange, try not to panic; a BCM reset may be just what you need to get it back on track. Safe travels!

Car Struggles To Start But Runs Fine: Common Causes And Solutions

Car engines are a nuisance to deal with and can present a variety of unforeseen issues. What happens if you turn on the engine, but it takes a while to start? If you rush to get there, it could become pretty problematic. If you stop in a crowded area or are travelling with someone, the circumstance might be humiliating. As soon as you can, you need to identify what is causing this problem. Let’s examine the potential causes of your car struggles to start but runs fire issue.

Coomon Causes Behind Car Struggles To Start But Runs Fine?

Your car may start slowly for a variety of reasons, but it should run normally once it is moving. Weather conditions, battery health, wiring problems, starter motor troubles, and fuel-pump health are just a few potential causes.

1. Problems With The Starter Motor And Starter Relay:

If your automobile makes a clicking noise when you try to start it, your starter relay or starter motor may be worn out. Over time, the electrical contacts that power your starter motor may deteriorate and supply less and less power to it. The trouble you experience when starting your automobile is due to the starter motor spinning slowly with less power. Your starter motor may sustain expensive damage if this isn’t fixed right away.

2. Battery Issues:

Your engine won’t start if your battery isn’t providing enough electricity to the starter motor. Your battery may well be the source of the issue. The life of your battery is nearing an end. A few delayed starts could be acceptable, but a battery that is nearing its end will probably fail at an undesirable time.

3. Fuel Concerns:

A blockage or leak in your gasoline lines may also be the reason your automobile has trouble starting but runs OK. Fuel lines carry fuel from the tank to the engine; any obstruction or volume loss due to a leak might cause the pressure to be lower than what is required to drive the engine. It’s not unusual for a blockage in a fuel line to cause your car to start slowly before running smoothly later.

4. Faulty Ignition Switch:

Another factor that contributes to a car’s difficult start yet smooth operation is the ignition switch. When damaged, the ignition switch can’t turn on the car because it can’t power the starter motor and other engine parts. As a result, you must repeatedly start the car to power the engine. This also prevents the switch from starting the engine.

5. Motor And Distributor Cap Damage:

The distributor cap is in charge of moving the electrical energy needed for the ignition of the engine from the ignition coil to the engine cylinders.

6. Unclean Air Filter:-

The air filter’s job is to give the car the oxygen it needs for combustion. Additionally, this filter stops dirt, debris, pollutants, and other impurities from entering the engine. Your automobile will have trouble starting if the air filter is blocked with debris, dirt, and other foreign objects because less oxygen is getting to the engine, which also results in delayed combustion. However, afterwards, the car will run smoothly.

7. Ineffective Alternator:

The spark required to start the engine is produced by the alternator, which also recharges the automobile battery. As a result, if your car starts and drives smoothly, the alternator may not be charging the battery properly.

8. Drive Belt Breaks:

The drive belts in your automobile may be the cause of why it takes longer for your car to start, even though it functions fine once it does. The charging system will be delayed due to a loose drive belt, which prevents the automobile battery from receiving enough power to charge.

Solutions To Fix The Issue Of Car Runs Fine But Starts Hard

If starting your automobile takes more than four seconds, you might have a problem. If it’s bitterly cold outdoors, this can just be a typical weather-related problem and not much of a cause for concern.

Step 1:- Identify The Issue

Determine whether the issue just arises during hot or cold conditions, or if it does so at all times. This will assist in focusing your search. Look for leakage indicators before doing anything else. Make sure that none of your wire has any nicks or bites. This kind of issue is sometimes brought on by a wire that has been excessively worn or bitten. Hoses fall under the same category. Slow starting can also be the result of corroded connections.

Step 2:- Examine The Battery

Your car will start less quickly over time as a faulty battery produces less and less power.

Step 3:- Examine Your Sensors

If temperature and airflow sensors are allowed to accumulate dirt over time, they may start to provide inaccurate results. It is easy to resolve this. The hardest step might be finding the sensors, but you should be able to do so with the aid of your vehicle’s manual.

Step 4:- Check Your Fuel Pump

Consider testing your fuel pump after checking your wiring and hoses for damage or leakage. By inserting the key into the ignition and turning the “on” switch without actually turning the engine on, you can accomplish this. Switch it off. Repeat the process twice more, and then on the third time, start the car so that the engine will start. You’ve currently found a solution if it boots up in three seconds or less. In this instance, you need to replace a gasoline pump that is weak.

Step 5:- Look Into Your Filters

Filters that are blocked are one of the most common reasons why your automobile struggles to start but otherwise operates smoothly. It might be the oil or air filter in this case. Both of these require routine maintenance or replacement.

Frequently Asked Questions:

Now, that we’ve covered the important aspects f the topic such as its causes and solutions. Let’s now delve into some FAQs of its to gain more insights into the topic.

1. If My Automobile Has Trouble Starting But Then Runs Smoothly, Is It Still Safe To Operate?

Ans. In general, it’s secure but quickly fixes the underlying problem to prevent unanticipated breakdowns.

2. Can The Issue Be Momentarily Fixed With A Jumpstart?

Ans. Yes, jumpstarting can be beneficial if the problem stems from a faulty battery. However, a long-term fix might entail replacing the batteries.

3. Why Does My Automobile Only Have Trouble Starting In The Winter?

Ans. Battery performance is impacted by the cold, and heavier fluids in the engine may make it more difficult to start. In extremely cold weather, think about utilising a battery warmer or block heater.

4. How Can I Stop This Problem From Happening Again?

Ans. Regular maintenance, such as checking the condition of your battery, replacing your spark plugs, and maintaining a clean fuel system.

Conclusion:-

In conclusion, when your car struggles to start but runs fine afterwards, it shows the problems with the starting system, such as a weak battery or a damaged starter motor. Now, that we’ve covered all the aspects of your query. We hope the above-mentioned information will be helpful to all the viewers. Additionally, if anyone faces any doubts feel free to contact us. Thank you for reading.

Driving With Bad Purge Valve: What You Need To Know

Imagine yourself travelling down the road in your car when all of a sudden, the engine light begins to flash. You might not be aware, but a malfunctioning purge valve is frequently to blame for this warning. Even though it’s a tiny, frequently disregarded component of your car, the purge valve is essential to how well it works. This article will examine the effects of driving with a defective purge valve, the causes it doesn’t go nice, and what you should do if this happens. As we explore the world of driving with bad purge valve, fasten your seatbelt.

What Is A Purge Valve?

Imagine your car as a giant, robust puzzle. The purge valve is one of the puzzle pieces that each has a specific function. A purge valve functions as the fuel system’s gatekeeper. The gasoline vapour that travels from the fuel tank to the engine is under its control. That might sound a little unusual, but trust us when we say it’s important for the health of your car.

Why Purge Valve Is Important?

There are many uses for the purge valve in your car. The purge valve, then, is very important to the proper operation of your car. Here’s why it’s crucial:

1. Emissions Control:

The purge valve aids in lowering your car’s hazardous emissions. You see, petrol may emit harmful vapours known as petrol as it rests in the fuel tank. These vapours may leak into the atmosphere and affect the surrounding area. The purge valve ensures that these vapours enter the engine, where they are burned up and transformed into clean exhaust, where they belong.

2. Better Gas Mileage:

For your car’s engine to operate effectively, the proper ratio of air and gasoline must be used. By regulating the flow of petrol vapours, the purge valve contributes to the preservation of this balance. Your car can use petrol more effectively when it’s functioning properly, which translates to greater gas mileage for you and fewer trips to the gas station.

3. Smooth Operation:

Visualise the engine of your car as a well-tuned orchestra. The components must all operate in unison. It can result in issues like harsh idling, which is like a performance blip in the engine if the purge valve isn’t doing its job.

4. Preventing Fuel Tank Pressure:

When the gasoline vapour cannot properly escape, pressure can build up in the fuel tank of your car. The purge valve makes sure the proper level of pressure is maintained, guarding against any tank damage.

Therefore, now as you can see, the small purge valve plays a significant role in maintaining low emissions, great gas mileage, and smooth engine operation in your vehicle.

Explain Some Common Cause Of The Bad Purge Valve

Let’s now discuss the possible causes of a malfunctioning purge valve. Car components can age with time, just like everything else. Here are a few typical explanations:

1. Dirt And Grime:

Just like your room can become untidy, so can the components of your car. The valve can become clogged with dust, dirt, and grime, decreasing its effectiveness.

2. Stuck Valve:

The valve may occasionally become stuck open or closed. It’s similar to a stuck door. Performance issues with your car could result from this.

3. Age:

Some pieces of your car will inevitably wear out as it gets older. This also applies to the purge valve. It may not perform as well as it once did.

4. Faulty Wiring:

Sometimes, it’s not the valve itself but the wires that connect it to the car’s computer. If these wires break or get damaged, the valve won’t work correctly.

Therefore, these are some common causes of the bad purge valve in your car.

What Happens While Driving With Bad Purge Valve?

So, your car’s purge valve is malfunctioning. What comes after that? Driving with a damaged purge valve can result in the following problems:

1. Low Petrol Mileage:

Your car may start consuming petrol faster than usual. Which can be very annoying and harmful to the environment.

2. Check Engine Light:

The tiny engine-shaped light that may illuminate your dashboard. That is your car’s way of signalling, “Hey, something’s not right!”

3. Rough Idling:

When you’re in traffic or stopped at a red light, your automobile may vibrate or shake. It seems like there is a minor hitch with your car.

4. Strange Smells:

The area around your car may smell strangely like petrol. That’s unpleasant and can indicate an issue.

Therefore, there are some consequences or problems. You may face this while driving your car. It’s better to solve this issue as early as possible.

How To Fix A Bad Purge Valve

Let’s move on to the important part now: how to repair a damaged purge valve. A few choices are as follows:

1. Cleaning:

Your purge valve may occasionally only require a thorough cleaning. It can be taken out by mechanics, along with any debris or sludge that may be creating issues.

2. Replacement:

A new valve may be required if the old one is too worn out or damaged. This is similar to buying a new toy when the old one breaks.

3. Wire Replacement Or Repair:

If the issue is with the wires, a qualified mechanic can replace or repair them.

Remember, if you believe your car has a purge valve issue, you must have a qualified mechanic inspect the vehicle.

Frequently Asked Questions:

Till now. we’ve covered the meaning of a purge valve, its importance, what happens while driving with bad purge valve and its solutions. Now, let’s dive into some FAQs additionally, to gain more insights about the topic.

Purge valve, how it works, symptoms, problems, testing

1. Can I Drive If My Purge Valve Is Damaged?

Ans. It is not advised because it can result in bad gas mileage and other problems. things’s best to have things mended as quickly as you can.

2. What Is The Price Of Repairing A Purge Valve?

Ans. Depending on the brand and model of your car, the price can change, but it’s typically not too high.

3. Can I Maintain The Purge Valve On My Own?

Ans. It is not recommended to carry out the solution on your own. You need to take the help of a mechanic. The proper equipment and skills are available to mechanics to properly clean or replace it.

Conclusion:

The purge valve is one of the key components of your car, which is similar to a large, intricate puzzle. When it malfunctions, it can lead to issues including terrible gas mileage and bumpy driving with bad purge valve. Be at ease, though! Whether it requires cleaning, replacement, or wiring repairs, mechanics know how to fix it.

Maintaining your vehicle is crucial. Your automobile will continue to run well on the road if you do routine maintenance and address issues as soon as they arise. Therefore, the next time your car’s check engine light illuminates, you’ll know it’s time to give it some TLC and make sure the purge valve is operating properly. Safe travels!

Importance Of Reset Maintenance Light On Toyota RAV4

Although the Toyota RAV4 is renowned for its dependability and endurance. Additionally, it still needs regular maintenance to stay in peak condition. Owners of Toyota RAV4 vehicles frequently experience the “Maintenance Required” dashboard light. Even while this light is a useful reminder. Moreover, it’s important to know how to reset it after you’ve finished the required maintenance. In this manual, we’ll look at the causes of the maintenance light on a Toyota RAV4, and the importance of how to reset maintenance light on Toyota RAV4. As well as we’ll walk you through the process of turning it off.

Why Does The Reset Maintenance Light Come On In Your Toyota RAV4?

The “Check Engine” light on your Toyota RAV4 does not mean there is an issue with the engine or emissions system. It serves as a notification when routine maintenance is overdue. The following are some typical causes for this light to shine:

1. Oil Change:

Depending on the model year and oil type of your RAV4. Additionally, hitting the mileage point for an oil change. Which normally occurs every 5,000 to 10,000 miles, is the most frequent cause of the maintenance light coming on.

2. Other Regular Maintenance:

Depending on your vehicle’s maintenance schedule, the light can also alert you to the need for additional regular maintenance activities, Moreover, it includes such as changing your air filter or rotating your tyres.

3. Battery Replacement:

Some RAV4 models use the maintenance light to alert you when the vehicle’s battery needs to be changed, which is typically every two to three years.

4. Resetting After Maintenance:

In order to prevent the maintenance light from staying illuminated after the required maintenance has been completed, it is imperative to reset the maintenance light.

How To Reset Maintenance Light On Toyota RAV4?

To reset the maintenance light on your Toyota RAV4, follow these simple steps:

1. Make Sure The Ignition Is Off:

Verify that the ignition is in the “Off” position.

2001-2005 Toyota Rav4 RAV 4 Ignition Lock Switch With Key OEM Auto for sale  online | eBay

2. Press And Hold The Odometer:

Locate the odometer button on the dashboard and press and hold it. Moreover, it is found near the speedometer of your instrument panel. Keep pressing it.

3. Turn Ignition “ON” Don’t Start:

Holding down the odometer button, turn the ignition to the “On” position without turning the key to the “Start” position. Push the “Engine Start/Stop” button twice without stepping on the brake pedal in order to start some newer RAV4 models.

4. Hold Odometer Until The Light Clears:

Holding the odometer button down for another 10 to 15 seconds should be sufficient to cause the maintenance light to turn off. Before the odometer display returns to the normal mileage reading, you will often observe a series of dashes or zeros.

5. Release The Button:

The odometer button should be released when the maintenance light has been reset.

6. Confirm Reset:

Start your RAV4 engine and check to see whether the dashboard maintenance light has disappeared. Try the reset procedure once again if it still exists.

Explain The Importance Of The Reset Maintenance Light

Your Toyota RAV4’s maintenance light acts as a signal that it’s time to undertake regular maintenance on your car. Even while it can only seem like a little irritation, ignoring it might seriously affect the performance and longevity of your car.

1. Timely Maintenance:

The maintenance light on your Toyota RAV4 will normally come on at predetermined mileage intervals to remind you to complete necessary maintenance procedures including oil changes, tyre rotations and fluid checks. Maintaining these schedules is crucial to the efficient operation of your car.

2. Longevity:

Your RAV4 will last longer with routine maintenance. By skipping these maintenance chores, your car’s lifespan will be shortened due to premature wear and tear.

3. Performance:

Maintaining your car has a direct impact on its performance in addition to its longevity. Vehicles that have been well-maintained typically operate more effectively, resulting in higher fuel economy and a smoother ride.

4. Safety:

Some maintenance procedures, such as brake inspections, are essential for your on-the-road safety. By ignoring the maintenance light, you may be skipping crucial safety inspections.

What Happens If You Ignore The Maintenance Light?

Therefore, till now we’ve covered the reasons behind the light coming on, and how to reset maintenance light on Toyota RAV4. As well as the importance of the light. However, now talking about its seriousness. It is not recommended to ignore the reset maintenance light of your Toyota RAV4. The following can be some consequences you might face if try ignoring it.

Toyota RAV4 review 2023 | Auto Express

1. Reduced Fuel Efficiency:

Not changing the oil, for instance, might cause the engine’s friction to grow, lowering fuel efficiency and raising your petrol prices.

2. Costly Repairs:

Postponing routine maintenance might result in later, more involved, and costlier repairs. A little problem that could have been resolved during routine maintenance could become a significant issue.

3. Risks To Safety:

Poor maintenance can put people at risk. Accident risk can be considerably increased by worn brake pads or tyres.

Conclusion:

It’s not simply a quick job; turning off the maintenance light in your Toyota RAV4 is essential. It makes sure that your automobile gets the maintenance it needs to run well, survive a long time, and keep you safe while driving. You may quickly reset maintenance light on Toyota RAV4 and take pleasure in a well-maintained and trouble-free driving experience by adhering to the straightforward instructions provided in this tutorial.

Please feel free to contact us, if you face any queries. Our top goal is the health of your vehicle. Happy and safe motoring!

Understanding The P0157 Code In Your Car

The P0157 error code is one of the possible causes of your check engine light coming on in your car. Which can be an unpleasant sight. This diagnostic issue code is associated with the oxygen sensor in your car. However, a vital part that keeps your engine functioning properly. We’ll debunk the P0157 code in this post by describing its significance, typical symptoms, and causes. We’ll also offer workable alternatives to assist you in resolving the problem and getting your car back on the road without incident. Let’s explore the world of auto diagnostics and solve the puzzle of P0157.

Understanding The P0157 Code In Your Car

An issue with the oxygen sensor situated in the bank 2 sensor 2 location is indicated by the diagnostic fault code P0157. Following their passage through the catalytic converter. Therefore, the exhaust gases are next monitored by this sensor for the presence of oxygen. With the help of its measurements, the engine control module (ECM) can precisely alter the air-fuel ratio for optimum engine performance and lower emissions.

There is not enough oxygen in the exhaust if there is a high mixture of oxygen and gas. Both a lean mixture and a rich mixture are bad for the catalytic converter. However, this can lead to the latter’s early failure. The voltage of the oxygen sensor alternates between low voltage (lean) and high voltage (rich). The power control module (PCM) stores this code. When it detects that the oxygen sensor has been operating at a low voltage for an extended period of time.

Common Symptoms Of P0157

Your car’s check engine light is like a silent alarm that lets you know something might be wrong under the hood when it comes on. The P0157 diagnostic trouble code (DTC) is one of the several diagnostic trouble codes (DTCs) that might cause this warning. It has to do with the oxygen sensor in your car. Understanding the P0157 code’s symptoms is essential for spotting and fixing any potential performance and emissions problems with your car. We’ll look at the typical symptoms in this section so you can learn how to interpret your car’s warning signals when it meets the P0157 code.

1. Check Engine Light:

The check engine light on your dashboard turning on is the most typical sign.

2. Reduced Fuel Efficiency:

As the engine works to maintain the proper air-fuel ratio, you may notice a decrease in gas mileage.

3. Rough Idling:

Your car could have rough idling or perform poorly in general.

4. Increased Emissions:

A broken oxygen sensor might cause an increase in emissions that could be bad for the environment.

Therefore, these are some common symptoms for the error code to occur in your car while driving. Be patient and read our full article.

Discuss The Causes Of The DTC P0157

For car owners, the P0157 error code might be a confusing problem, but accurate diagnosis and repair depend on an awareness of its root causes. This code is associated with the vehicle’s oxygen sensor, which is essential to the functionality of your engine. This section will go into the numerous causes of the P0157 code, explaining why it could occur and what to watch out for when diagnosing this automotive problem. By the conclusion, you’ll have a better understanding of the motivation behind this code and how to approach it.

1. Oxygen Sensor Malfunction:

Therefore, this is one of the first causes of your error code. The DTC code occurs because the sensor itself may be harmed or old.

2. Wiring Or Connection Problems:

Signal transmission can be hampered by damaged cables as well as shoddy connections between the sensor and the ECM.

3. Exhaust Leaks:

Before the sensor, leaks in the exhaust system can cause false readings.

4. Problems With The Catalytic Converter:

If the problem with the catalytic converter occurs. However, the functioning of the sensor can be impacted by a failed catalytic converter.

5. Vacuum Leaks:

The air-fuel combination can be disrupted by air leaks in the engine’s intake system, additionally, can alter sensor readings.

Therefore, these are some common causes for the error code to occur in your car while driving.

How Serious Is The P0157 Error Code?

The moderate seriousness of the P0157 error code. It can make the automobile difficult to drive or perhaps cause it to stall altogether. If the issue is ignored, the catalytic converter may sustain damage over time that would be costly to repair. It is advised that this issue be resolved as soon as possible.

Tips To Fix The P0157 Error

However, it’s essential to fix the P0157 error code to keep your car operating efficiently and cut emissions. As well as we’ll outline a methodical procedure for tackling this problem in this article.

Guide to Solutions in Steps:

1. Diagnose:

Verify the P0157 code with an OBD-II scanner, moreover, evaluate the sensor’s functionality.

2. Check Sensor And Wiring:

Inspect the oxygen sensor for contamination or physical damage. Therefore, check the connectors and wiring harness for frayed or broken wires.

3. Address Exhaust Leaks:

Before installing the oxygen sensor, carefully check the exhaust system for leaks. Fix any leaks you find.

4. Check The Catalytic Converter:

Verify the condition of the catalytic converter by checking it. Additionally, replace the broken or inefficient converter.

5. Fix Vacuum Leaks:

Check the engine’s intake system for any vacuum leaks that may be present. Therefore, these might change the air-fuel ratios.

6. Replace The Oxygen Sensor:

Additionally, take out the broken sensor and replace it with a fresh unit that meets the same requirements.

7. Clear The Code:

To remove a trouble code from the vehicle’s memory, use an OBD-II scanner. Before clearing, make sure the problem is resolved.

8. Test Drive:

Drive your car to make sure everything is working properly as well as look if the check engine light is not on.

9. Ongoing Maintenance:

To stop future problems, regularly check for any new trouble codes and carry out standard vehicle maintenance.

Moreover, these instructions will help you correctly identify and fix the P0157 error code, ensuring that your automobile runs well and satisfies emission regulations.

Repairing Cost Of P0157 Code

The cost of repairing the P0157 code in a car can vary widely depending on several factors. On average, you can expect to spend between $100 to $400 for parts and labour. The primary cost factors include the make and model of your vehicle, the location of the faulty oxygen sensor (accessible or hard to reach), and whether additional components like the catalytic converter need replacement. It’s advisable to consult with a trusted mechanic or service centre for a precise estimate tailored to your specific vehicle and its needs.

Conclusion:

For the performance and emissions of your car, it’s critical to fix the P0157 code. You can effectively deal with this problem by using the procedures mentioned. Therefore, please don’t hesitate to inquire if you need anything or if you have any queries or need further help. We appreciate you reading our essay, and we hope it was beneficial.

Explain P0332 Code In Detail

A variety of sensors and systems are included in modern automobiles to monitor performance and spot potential problems. The OBD-II system, which can produce error codes to highlight particular problems, is one tool in this diagnostic toolbox. One such instance is the P0332 code. We’ll explain the P0332 code’s significance in layman’s words in this article.

Explain A P0332 Code In Detail

The Knock Sensor 2 circuit in your car’s engine is the subject of the diagnostic issue code P0332. Let’s dissect the essential parts of this code to better comprehend it:

1. Knock Sensor:

The knock sensor, a tiny component in your engine, is in charge of identifying unexpected vibrations or “knocks” brought on by improper combustion. It’s essential for maintaining the functionality and health of your engine.

2. Circuit:

The term “circuit” refers to the electrical conduit through which data can be transferred from the sensor to the onboard computer system of the vehicle.

3. Sensor 2:

Several knock sensors, usually numbered, can be found in some engines. However, in this configuration, the second sensor is typically referred to as Sensor 2.

The P0332 code is set off by your car’s OBD-II system when it notices anomalies in the Knock Sensor 2 circuit. This could be a sign of problems like:

  • The knock sensor may not be working properly, which would produce false readings.
  • Corroded or damaged wires in the circuit can prevent electrical impulses from flowing properly.
  • Inaccurate readings might be caused by defective connections at the sensor or the car’s computer.

What Are The Symptoms Of The Error Code?

The existence of the P0332 code may be indicated by any of the following symptoms:

1. Check Engine Light:

The check engine light on your dashboard is the most typical indicator of a fault code.

2. Reduced Performance:

The engine’s failure to optimise combustion however could result in a decrease in your car’s performance.

3. Low Fuel Economy:

The engine may not be operating as efficiently as it should, which would cause a reduction in fuel efficiency.

4. Engine knocking:

Your engine may actually make knocking or pinging noises while running if the knock sensor isn’t working properly.

Therefore, these are some symptoms of the error code. You can solve this issue on your own or else can contact a mechanic to navigate the situation.

What Are The Causes Of The P0332 Code?

The P0332 code indicates a problem with the car’s knock sensor in cylinder 2. Here are the causes simply explained:

1. Faulty Knock Sensor:

The sensor that detects engine vibration may be damaged, as well as resulting in false readings that affect engine performance.

2. Wiring Problems:

Damaged or corroded wires connected to the knock sensor, however, can prevent its communication with the engine computer.

3. Sensor Connection Problems:

A poor connection between the knock sensor and the engine control module can additionally cause incorrect signals.

4. Mechanical Problems:

Additionally, excessive carbon buildup as well as worn-out spark plugs in cylinder 2 may result in false knock sensor signals.

5. Control Module Fault:

If the engine control module is broken, it may interpret the knock sensor’s signals incorrectly, setting off the trouble code.

Therefore, these are some common causes of the DTC P0332 code. You must solve this error code as early as possible.

How To Fix The Error Code?

For proper diagnosis and repair, it is best to seek the advice of a qualified mechanic because the knock sensor and its circuit are crucial to the health of your engine. Here is an overview of what the procedure entails:

1. Code Scanning:

To retrieve the P0332 code and other relevant data, a mechanic will employ a diagnostic scanner.

2. Sensor Inspection:

Additionally, the knock sensor will be visually inspected for any wear or physical damage.

3. Checking Wiring And Connections:

In order to find any problems, the mechanic will examine the wiring and connectors connected to the knock sensor.

4. Testing The Sensor:

Specialised equipment may evaluate the sensor’s performance and its precision in detecting engine knocks.

5. Addressing The Problem:

Depending on the diagnosis, the mechanic may replace the sensor, fix the wiring, or clean the engine.

Conclusion:

The P0332 code is a warning sign that there may be a problem with your car’s knock sensor 2 circuit. By addressing this problem quickly, you will not only maintain your engine’s performance but also prevent potential long-term damage. Consulting a professional mechanic is the best way to ensure that your vehicle runs smoothly and efficiently on the road. Now, that we’ve covered all the aspects of your query. We hope the above-mentioned information will be helpful to all the viewers. Additionally, if anyone faces any doubts feel free to contact us. Thank you for reading!