Why Transmission Downshifts Hard While Slowing Down?

It might be unsettling and uncomfortable when your automobile suddenly jerks or shudders as it downshifts while slowing down. This problem is also referred to as “hard downshifting.” It can be caused by several different things in your car’s gearbox system. In this post, we’ll examine why transmission downshifts hard while slowing down. Additionally will also suggest potential fixes, and offer advice on how to keep your car in good working order.

The causes of the issue will be covered first, followed by a discussion of solutions and preventative measures. The price to correct this issue will then be revealed. So let’s get started right away.

Causes Of Transmission Downshifts Hard While Slowing Down

Let’s now discuss the causes of the issue where the gearbox abruptly downshifts when slowing down and discover more about the potential source of this problem. Knowing the causes is usually helpful because you can quickly calculate how much money will be required to solve the issue.

1. Mechanical Deterioration:

Just general wear and tear on gearbox parts can cause a lack of accuracy during gear changes, which can result in jerky downshifts.

2. Transmission Fluid Is Low:

For seamless gear shifting, gearbox fluid is necessary. As the gearbox struggles to correctly engage gears, low fluid levels can cause downshifts to be unpleasant or delayed.

3. Worn-Out Clutch Bands Or Plates:

Ageing clutch plates and bands may result in unpredictable downshifts. This may cause the lower gears to engage abruptly and firmly, making downshifting difficult.

4. Defective Solenoids:

The transmission movement of fluid inside the gearbox is managed by solenoids. A sudden downshift can be caused by malfunctioning solenoids, which can mess up the timing of gear changes.

5. Fluid Filter That Is Dirty Or Clogged:

The gearbox fluid filter keeps dirt out of the gearbox, as explained. A clogged filter limits fluid flow, which affects gear changes and could result in abrupt downshifts.

6. Problems With The Transmission Control Module (TCM):

The TCM is in charge of controlling gear shifts depending on numerous inputs. Incorrect signals could be sent by a broken TCM, resulting in poorly timed downshifts.

7. Problems With Vacuum Modulators:

An older transmission’s vacuum modulator aids in controlling shifting in those automobiles. Downshifts may be rapid and unpleasant if this component fails.

8. Issues With Torque Converters:

The torque converter moves power from the engine to the gearbox, as explained. Problems with the lockup clutch or the converter’s ability to smoothly disengage might cause abrupt downshifts.

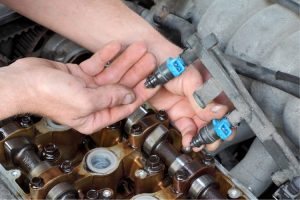
9. Malfunction Of The Throttle Position Sensor (TPS):

The TPS informs the car’s computer about the throttle position. Incorrect signals could be sent by a malfunctioning TPS, which would cause abrupt downshifts while slowing down.

10. Overheating In The Gearbox:

Fluid quality can deteriorate at high gearbox temperatures, which might compromise its capacity to lubricate and promote smooth shifts. Unpredictable downshifting and other gearbox problems might result from overheating.

When you slow down, having difficult transmission downshifts might be a sign of a number of other transmission-related problems. In order to prevent further damage and to provide a safer and more comfortable driving experience, it is critical to repair these issues as soon as possible.

How To Fix Hard Downshifts While Slowing Down?

It can be alarming to experience abrupt downshifts in your car’s gearbox when slowing down. This manual provides eight steps for identifying and fixing this problem for smoother driving.

Step 1: Safety First

Make sure your automobile is parked securely, that the engine is off, and that the parking brake is applied.

Step 2: Check The Level Of The Gearbox Fluid

Use the dipstick to check the gearbox fluid level while the engine is running and warming up. Rough downshifts might be caused by low or dirty fluid. Refill the fluid or else you can also replace it.

Step 3: Examine The Gearbox Fluid Quality

Clear and pinkish gearbox fluid indicates good fluid quality. The fluid that is dark or smells burned suggests a problem. If the fluid is discoloured, think about flushing it and replacing it.

Step 4: Lookup Error Codes

To extract any problem codes from the car’s computer, use an OBD-II scanner. These codes could offer information about the problem affecting downshifts.

Step 5: Throttle Position Sensor (TPS) Inspection

Transmission behaviour may be affected by a failing TPS. Check and validate the TPS’s appropriate operation. Replace as required.

Step 6: Inspection of Gearbox Mounts

Rough shifts might be brought on by worn or damaged gearbox mounts. Look for any damage or unusual wear. Replace as necessary.

Step 7: Examine Vacuum Lines And Sensors

In cars with vacuum-controlled gearboxes, defective sensors or damaged vacuum lines can cause jerky downshifts. Moreover, check for damage and replace any faulty parts.

Step 8: Transmission Adaptation Reset

Some contemporary transmissions pick up on driving habits and adjust. Additionally, a severe downshift could be the result of adaptation from prior driving. If necessary, reset the gearbox adaption by consulting a specialist or the owner’s manual for your car.

Step 9: Visit A Specialist

Take your automobile to a trained mechanic or gearbox specialist. Moreover, if the problem persists or if you have questions about any of the processes. They are able to make a more thorough diagnosis and suggest suitable remedies.

Step 10: Test Drive

After making any repairs or modifications, drive your automobile to see if the downshift problem has been resolved. As well as keep an eye on the transmission’s behaviour as it slows down.

Please keep in mind that fixing harsh downshifts necessitates careful examination and possible alterations to numerous transmission-related components. You can get back smoother downshifting by following these instructions and getting help from a professional when necessary. This will also improve your driving.

Explain Preventive Measures For Hard Downshifts

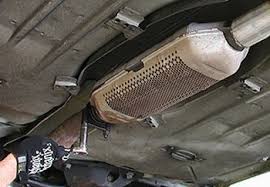
Because you never know what can be the root cause of the transmission downshifts hard while slowing down in the first place, preventing this issue might be challenging. Since numerous of these factors can result in a problem like this. However, we can suggest that you keep up with routine auto maintenance. When the fluid reaches the service interval, flush it.

Additionally, you must regularly check your fluids to make sure they are full. Every car owner should perform this fundamental preventive maintenance in order to stay ahead of problems like these. ATF will probably need to be added if the car is a little older. This is not at all frightening. The gearbox should never be left with little fluid since only then could serious problems arise that could be very expensive to correct.

How Much Does It Costs?

If you take action as soon as you discover the first signs of issues, fixing a situation like this won’t be prohibitively expensive and probably won’t necessitate rebuilding the gearbox. Most frequently, the solenoids or gearbox fluid are to blame. In the worst case, you might have to shell out up to $250 to flush the fluid or about $500 to replace the solenoid.

Conclusion:

Finally, having transmission downshifts hard while slowing down in your car may be a sign of a number of underlying gearbox system issues. To stop future damage and guarantee a smooth driving experience, it’s critical to solve this issue right away. You can take the proper action to fix the issue by determining the precise cause, whether it has to do with fluid levels, solenoid problems, or mechanical components. Therefore, such problems may be avoided, and regular maintenance can extend the life and performance of your vehicle’s gearbox system. Consulting a qualified mechanic can help.

Reasons Behind Ford Escape Transmission Won’t Engage?

It’s fantastic to have a Ford Escape for your daily commute, but it may be annoying when the gearbox has problems. The gearbox in your car is crucial in transferring engine power into motion, and it can ruin your driving experience if it doesn’t engage properly. In this post, we’ll examine the typical causes of ford escape transmission won’t engage and will offer straightforward fixes to help your Ford Escape resume smooth driving.

Reasons Behind Ford Escape Transmission Won’t Engage?

Like any other automobile issue, detecting a gearbox issue can help you save money and prevent further injury. It’s crucial to know how to spot warning signs of gearbox problems and how to respond swiftly.

Some of the most typical indications of gearbox problems or failure include the following:

1. Refusal Of Switching Gears:

It will be challenging for the electric Ford Escape to shift gears. It will occasionally flat-out refuse to shift gears. The unwillingness to shift gears frequently results in inadequate or defective fluid.

2. Burning Smell Produced:

The burning smell is an indication of how hot the gearbox is. Old gearbox fluid might also contribute to the burning smell. Consequently, changing the fluid can be crucial. Excessive heat, which is necessary to safeguard this intricate system, is the main cause of the burning smell.

By driving more miles, the fluid loses its ability to lubricate, which leads to an increase in damaging friction. The resulting contact causes mud and debris to form. The ford escape gearbox won’t engage as a result of these issues, which will eventually cause the gearbox to completely fail and become too expensive to repair.

3. Dragging Clutches:

Anywhere you press the clutch pedal, a pull-up clutch happens because the clutch is unable to separate the clutch disc from the flywheel.

4. Low Transmission Fluid:

In the transmission system, transmission fluid serves as a lubricant and a coolant. Low fluid levels prevent the gearbox from producing adequate hydraulic pressure to effectively engage gears.

5. Issues With Torque Converters:

Power is transferred from the engine to the gearbox by the torque converter. Its malfunction may cause sliding or a delay in the engagement of the gears.

6. Failure Of The Gearbox Range Sensor:

The gearbox range sensor aids in the computer’s understanding of the position of the gears in the vehicle. A broken sensor can make it difficult for the computer to choose the right equipment.

7. Problems With The Gearbox Control Module (TCM):

Based on information from sensors, the TCM manages various gearbox operations. Erratic gear shifting or failure to engage gears may result from the TCM not functioning properly.

8. Warning Light On Engine:

The engine light on your Ford Escape dashboard may indicate both serious and non-serious problems. So, even if it’s on, be sure to check the data transfer and fix any problems. You can identify present or potential issues with the use of an engine light.

Therefore, these are some basic reasons behind your ford escape transmission won’t engage in your car.

How Can A Ford Escape Gearbox Issue Be Fixed?

Incorporated sports car Ford Escape was initially manufactured in 2001. The Escape, like any other car, could experience gearbox issues such as liquid leaks, unusual flexibility, and mechanical gearbox failure. But these issues can be resolved using certain problem-solving techniques. Over time, using these techniques can help you save money by preventing expensive trips to the garage.

1. Make Use Of Existing Transmission:

Purchase a gearbox from another car, then install it in your Ford Escape. This is the quickest fix for this problem. Your present transfer issues will be avoided by doing this. Once installed, this will help you get your bearings. You aren’t certain, though, that you are aware of your present transfer status.

The implication of this is that in the next years, you might experience similar issues. If you’re high, the warranty is typically only good for 90 days and can be very pricey.

2. Your Gearbox Needs To Be Repaired:

The next step would be to change the current gearbox and contact your neighbourhood power supplier. It could be a good idea to phone a few places to get an idea of the pricing because professional skills and knowledge vary from professional to professional and shop to shop. A 1-2 year warranty is often included with adjusted delivery.

3. Purchase A Remanufactured Ford Escape Gearbox:

This is the greatest choice for you if you want your automobile to be a daily driver and you want to feel secure each time you start it in the morning.

It is the most expensive item on the list, but it will provide any driver who experiences gearbox issues with the Ford Escape peace of mind.

Conclusion:

The Ford escape transmission won’t engage can occasionally be identified and fixed. Other problems will call for the assistance of experts or certified Ford dealers. Try to pinpoint the issue yourself before visiting a dealer with your car. It can be sufficient to simply change the gearbox fluid to restore your car’s functionality.

Now, that we’ve covered all the aspects of your query. We hope the above-mentioned information will be helpful to all the viewers. Additionally, if anyone faces any doubts feel free to contact us. Thank you for reading!

What Is The ASC System Service Required Light?

If you own a Mitsubishi, you might have seen a puzzling warning light on the dashboard of your car. It says, “ASC System Service Required.” The Active Stability Control (ASC) system warning light is on, and it signifies that one or more of the ASC system’s components may be malfunctioning. The ASC system service required light on your car’s dashboard is a typical yet frequently misunderstood warning. This indicator light is related to the Automatic Stability Control (ASC) system in your car.

Which is essential for improving driving stability. Therefore, in this post, we will examine the causes of the ASC system service required light, look at easy fixes, and provide you advice on how to maintain a safer and more pleasurable driving experience.

What Is The ASC System Service Required Light?

Imagine yourself behind the wheel on a slick or rainy road. Your car’s tyres may occasionally lose traction and begin to slide or skid. When the tyres aren’t adequately gripping the road. It’s more difficult to manoeuvre and stop the automobile, which can be dangerous. This is where the ASC system can be useful.

Moreover, your car’s behaviour is continuously monitored by the ASC system using sensors. The automobile’s speed at which each wheel spins, how much you crank the steering wheel, and even whether the car is beginning to skid or slide are all factors that the computer monitors. If it notices that your automobile might be slipping out of control, it intervenes to help.

How Does ASC System Service Light Works?

In an emergency, the ASC system is a crucial safety component that could save your life. It functions by lowering the possibility of a rollover, increasing vehicle stability, and lowering the risk of oversteering or understeering during high-speed manoeuvres.

1. Sensors:

The ASC system is equipped with sensors that are affixed to the car’s wheels and other components. These sensors provide data to the system’s “brain,” which is a computer.

2. Computer Mind:

The computer swiftly processes all of the sensor data. It determines whether any wheels are turning too quickly or slowly, whether the automobile is beginning to skid, or whether you are turning the steering wheel excessively.

3. Power Adjustment:

The computer has the ability to gradually limit the power going to a wheel if it detects that one of the wheels is spinning too quickly (for example, when you accelerate and a tyre starts to slide on a slick road). This aids in the tyre regaining traction and reduces excessive tyre spinning.

4. Brake Control:

The computer has the ability to apply the brakes to individual wheels if it detects that the vehicle is about to slide or skid. By slowing down the spinning wheels and improving your ability to steer, this aids in regaining control of the vehicle.

5. Assistance With Stability:

In specific circumstances, the ASC system can also collaborate with other automotive components, such as the engine and brakes, to help stabilise the vehicle during abrupt turns or swerves. It assists in keeping the car moving in the desired direction and preventing it from veering off course.

Therefore, to put it simply, the ASC system functions as a smart assistant for your car. It monitors your car’s behaviour using sensors and a computer and intervenes when conditions become slick or you’re in danger of losing control. In order to keep you safe and steady when driving, particularly on rough roads, it modifies the power going to the wheels and employs the brakes.

Reasons For System Service Light To Come On

The ASC system service required light might come on for a number of reasons, such as issues with the ABS, traction control, or stability control system. When the system notices a flaw or failure that could impair the vehicle’s stability and control, this warning light is intended to illuminate. Depending on the make and model of the car, the warning light can appear in a variety of ways, but it typically takes the form of a yellow or amber car with squiggly lines behind it.

1. Incorrect Wheel Speed Sensor:

A broken wheel speed sensor is one of the most frequent reasons for the warning light to come on. The wheel speed sensor is in charge of keeping track of each wheel’s speed and reporting it to the ASC system. The system might not get the right speed data if one of the four sensors malfunctions, which could lead to a malfunction and turn on the warning light.

2. Ineffective ABS System:

A broken ABS system is another frequent reason why the ASC system warning light illuminates. Since the ASC system and the ABS system are interdependent, an issue with the ABS system may result in a malfunction of the ASC system and the activation of the warning light. A broken hydraulic pump, faulty sensors, or damaged wiring can all affect the ABS system.

3. Defective Yaw Rate Sensor:

The ASC system warning light may also illuminate due to a malfunctioning yaw rate sensor. The vehicle’s rate of rotation along its vertical axis is measured by the yaw rate sensor. The yaw rate sensor’s data is essential for detecting whether the car is understeering or oversteering. The ASC system may not be able to accurately detect the vehicle’s movement if the sensor malfunctions, which could result in a loss of stability and control.

4. Battery Problem:

Another potential reason for the ASC system warning light to illuminate is low battery voltage. A steady power source is necessary for the ASC system to function properly. The voltage levels and system performance may be impacted by a weak or discharged battery, which could also turn on the warning light.

5. Failed Control Module:

The electronic control modules used by the ASC system evaluate sensor information and adjust engine or braking power as necessary. The system might not operate correctly, which would cause the warning light to turn on if there is a problem with one or more control modules.

6. Low Brake Fluid:

For the ASC system to function properly, the brake fluid level must be constant. The hydraulic pressure of the system may be impacted by low brake fluid levels, which could result in a malfunction and turn on the warning light.

7. Blowing A Fuse:

The ASC system’s electrical circuit can have a blown fuse, which can result in a malfunction and illuminate the warning light. Fuses may blow as a result of electrical issues or system overload, which may result in a short circuit.

Therefore, these are some common reasons for the ASC system service required light to come on while driving the car.

How To Fix The ASC System Service Light?

Your car’s ASC (Automatic Stability Control) system is essential for preserving stability and traction. A potential problem is indicated if the ASC System Service Required light illuminates. To identify and solve the issue, follow these steps.

1. Security First:

Make sure to park your car securely, turn off the engine, and use the parking brake.

2. Engine Restart:

Restart the automobile after shutting it off. Sometimes a small glitch will cause the light to turn on, but this bug can be fixed by doing this.

3. Check Traction Control Button:

Make sure the Traction Control button hasn’t been unintentionally deactivated. Turn it on if it’s off and check to see if the light goes out.

4. Examination Of Wheel Speed Sensors:

The light may come on if the wheel speed sensors are dirty or broken. Look for debris or obvious damage on each sensor. Replace or clean as necessary.

5. Examine The Brake System:

Stability control difficulties can impact the brakes. Search for any indications of a malfunction, such as leaking brake fluid or damaged brake pads. Deal with any brake-related issues.

6. Align The Wheels:

The ASC light may come on due to improper wheel alignment. If required, have a professional examine your alignment.

7. Check The ABS System:

The ASC is connected to the ABS (Anti-lock Braking System). ABS problems may have an effect on ASC. Get the ABS system checked out and fixed.

8. Lookup Error Codes:

To extract error codes from the car’s computer, use an OBD-II scanner. These codes give precise details about the issue.

9. Visit A Specialist:

Take your car to a qualified mechanic if you can’t figure out the problem. They can use specialised tools to carry out a complete diagnosis.

10. Set The Light Back:

A mechanic can use their diagnostic instruments to resolve the problem and then turn off the ASC System Service Required light.

11. Test Drive:

Perform a brief test drive to make that the ASC system is operating properly and the light is not on.

12. Continual Upkeep:

To avoid more ASC light difficulties, maintain regular auto maintenance, including monitoring tyre pressure, brakes and other crucial systems.

Do not forget the ASC System Service. Required lights often indicate problems with traction control and stability systems. Your car’s performance and safety can be guaranteed with prompt diagnostics and repair.

Conclusion:

Consequently, the ASC system service required light is a critical warning indicator that points to a problem or malfunction with the vehicle’s stability control system. The ASC system is a crucial safety component that guarantees your car’s control and stability during manoeuvres at high speeds. If the light comes on, it is essential to have the system examined and fixed by a licenced mechanic. If the warning sign is ignored, the vehicle’s stability and control may be compromised, which may cause accidents and injuries.

Now, that we’ve covered all the aspects of your query. We hope the above-mentioned information will be helpful to all the viewers. Additionally, if anyone faces any doubts feel free to contact us. Thank you for reading!

What Is The Shelf Life Of Synthetic Motor Oil?

Improved engine performance, longevity, and protection are all benefits of using synthetic motor oil. However, it has a shelf life just like any other product. In this post, we’ll examine what is the shelf life of synthetic motor oil and tips for ensuring its top performance. It’s essential to comprehend this component if you want to keep your engine healthy and effective.

Explain The Benefits Of Using Synthetic Motor Oil

Synthetic motor oil is a technological miracle in the field of automotive lubricants, providing a wide range of advantages that improve engine performance, longevity, and the entire driving experience. Synthetic motor oils are precisely created in laboratories to meet and exceed the demands of modern engines, in contrast to conventional lubricants, which are made from crude oil.

1. Improved Lubrication:

The homogenous molecular structure of synthetic oils ensures consistent lubrication in a range of temperatures and environmental factors. This lessens wear and friction, resulting in better engine operation.

2. Temperature Stability:

In severe temperatures, synthetic oils remain more viscous than natural oils. They keep engine parts safe by flowing easily during cold starts and resisting thinning in hot weather.

3. Improved Fuel Efficiency:

Reduced friction and greater lubrication help to increase engine efficiency, which eventually leads to higher fuel economy.

4. Extended Engine Life:

Synthetic oils provide improved protection, which results in less wear and tear on important engine components, potentially prolonging the engine’s life.

5. Cleaner Engines:

Since synthetic oils contain fewer pollutants and contaminants, engines are kept cleaner and sludge formation is decreased. This encourages smoother engine operation and reduces the possibility of blockages.

6. Performance During Cold Starts:

Synthetic oils flow more smoothly at lower temperatures, ensuring faster lubrication during cold starts and reducing engine wear at crucial times.

7. Reduced Deposit Formation:

Synthetic oils’ cutting-edge compositions help keep engine components clean by preventing the buildup of varnish and deposits.

Can Motor Oil Get Expired

Yes, motor oil has a shelf life. The oil loses some of its ability to properly lubricate and protect the engine as the additives and chemicals degrade over time. This degrading process can be hastened further by exposure to moisture, pollutants, and temperature changes. Using old motor oil can increase wear, friction, and the risk of engine damage.

To ensure that your engine receives the ideal lubrication it needs for smooth and effective running, it is crucial to adhere to the manufacturer’s recommendations for oil change intervals and storage conditions.

What Is The Shelf Life Of Synthetic Motor Oil? [Explained]

Synthetic motor oil has advantages that go beyond lubrication. Modern vehicles’ total performance and lifetime are improved because of their cutting-edge qualities, which offer the best possible engine protection, effectiveness, and cleanliness. Selecting synthetic motor oil is a proactive move towards maintaining an effective and healthy engine. Additionally for a more pleasurable and environmentally friendly driving experience.

1. Additives Degrade:

Over time, the unique additives that improve oil performance to deteriorate. Moreover, by decreasing the oil’s efficiency in lubricating and safeguarding the engine.

2. Temperature And Storage:

The oil’s shelf life may be shortened by exposure to high temperatures and poor storage conditions.

3. The Integrity Of The Container:

Damaged or inadequately sealed containers permit the entry of air and pollutants, hastening the deterioration of the oil and shortening its shelf life.

4. Exposure To Moisture:

Moisture can permeate the oil, by accelerating its oxidation and degradation. Additionally, by reducing its effectiveness to shield the engine.

5. Oil Formulation:

Because of their cutting-edge formulations, which are made to withstand disintegration and preserve stability over time, high-quality synthetic oils frequently have extended shelf lives.

Simple Tricks To Extend Synthetic Motor Oil Shelf Life

While motor oil (both conventional mineral oil and synthetic oil) is thought to be stable under ideal circumstances, it will eventually lose its effectiveness. You should consider aspects like significant temperature swings, oxidation, and the function of synthetic additives in your oil in addition to its expiration date. The amount of time it may last depends on how you store it.

1. Choose Quality:

For products with a longer shelf life, choose reputed brands with cutting-edge formulas.

2. Cool Storage:

Keep oil out of the sun’s rays and excessive heat sources in a cool, dry location.

3. Seal Integrity:

To avoid exposure to air and moisture, make sure that containers are properly sealed.

4. Inspection:

Frequently check the oil for colour, consistency, and any symptoms of deterioration.

5. Label Dates:

To precisely measure shelf life, keep track of the dates of purchase and storage.

Frequently Asked Questions:

Till now we’ve learned about benefits of using synthetic oil, what is the shelf life of synthetic motor oil, simple tricks to increase the shelf life. Now let us see some frequently asked questions to gain more insights about the topic.

1. Can Old Oil Damage My Engine?

Ans. Using old oil might reduce an engine’s protection and performance. To ensure the best possible engine health, it is best to replace it.

2. How Can I Determine If Synthetic Oil Has Deteriorated?

Ans. Look out for alterations in colour, consistency, and a bad smell. It’s time to change the oil if you see these symptoms.

3. Can I Use Additives To Extend The Shelf Life Of Oil?

Ans. Although certain additives assert to increase shelf life, it is advised to concentrate on correct storage and selecting high-quality oil brands.

Conclusion:

Maintaining the performance advantages of synthetic motor oil requires knowledge of the shelf life of the product. You can make sure that your oil maintains its efficacy and adds to the durability of your vehicle’s engine by taking into account storage conditions, container integrity, and the selection of quality items. Therefore, if you’re wondering what is the shelf life of synthetic motor oil. Please refer this article in detail. Thankyou for reading!

What Does Slipping The Clutch Mean?

Do you know what “slipping the clutch” means? Have you heard it before? This article deconstructs what does slipping the clutch mean in your car. As well as it examines the causes of clutch slippage, and how it affects your car. Additionally, why do both new and seasoned drivers need to comprehend this phenomenon?

It is advised that a clutch be examined at 60k miles or more. Due to the widespread occurrence of sliding clutches in manual gearbox vehicles. You’ve probably heard the term “clutch slipping,” which refers to when your clutch disengages and no power is being transferred to the wheels to move or propel the car ahead.

What Does Slipping The Clutch Mean?

When the clutch engages and disengages without delivering any power to the wheels, this is known as clutch slipping. As a result, the automobile will not move forward. Slipping the clutch is the practice of partially engaging the clutch pedal. While simultaneously depressing the gas pedal in vehicles with manual transmissions.

Smoother starts and shifts are made possible by this intentional creation of a regulated friction point between the engine and the transmission. It is frequently utilised when managing slow traffic or performing precise manoeuvres.

1. Friction Control:

The clutch connects the engine to the gearbox in a manual gearbox vehicle. The engine’s power is disconnected from the gearbox when the clutch pedal is fully depressed, enabling smooth gear changes.

2. Partial Clutch Engagement:

Slipping the clutch involves merely partially releasing the pedal after changing gears, as opposed to fully doing so. This keeps the torque of the engine under control while still allowing some power to pass to the gearbox.

3. Smooth Gear Changes:

Slipping the clutch during gear changes can help match the engine’s speed to the speed of the new gear smoothly. As a result, the car won’t suddenly jolt and the gearshift will be smooth.

4. Low-Speed Manoeuvres:

When driving at low speeds, such as when parking or in congested traffic, the clutch is frequently slipped. It gives the driver more precise control over the power applied to the wheels and avoids stalling.

5. Wear And Tear:

While severe or prolonged clutch slippage can result in greater wear on the clutch plate and other components, shortening their lifespan, it can also help with smooth gear shifts.

Slipping the clutch is a technique used by expert manual gearbox drivers to perfect the art of smooth gear changes, enabling a comfortable and in-control driving experience.

What Causes The Clutch To Slip?

After learning about what does slipping the clutch mean. Let’s see the causes of the slipping clutch. In cars with manual transmissions, the clutch is essential for connecting the engine to the wheels. But occasionally the clutch can slip, preventing the passage of power.

1. Worn Clutch Disc:

As the clutch disc ages, there may be less friction between the clutch’s parts, which might result in slippage.

2. Weak Clutch Pressure Plate:

When the clutch is engaged, the clutch disc slips because the pressure plate is unable to retain the clutch disc firmly.

3. Contaminated Clutch Surface:

Oil or grease seeps onto the clutch surface, lowering friction and resulting in sliding.

4. Correct Clutch Adjustment:

Incorrect clutch cable or hydraulic system adjustments can prevent the clutch from properly engaging, causing sliding.

5. Broken Or Worn Clutch Springs:

Uneven pressure and slippage can be caused by damaged or worn clutch assembly springs.

Your driving experience is impacted by clutch slippage since it decreases acceleration and efficiency. A smoother journey can be guaranteed by determining the cause early and obtaining professional assistance.

How To Fix The Slipping Clutch?

Your driving performance may suffer if your vehicle’s clutch slips, which can be annoying. When the clutch doesn’t engage properly, there is a loss of power between the engine and gearbox, which is known as clutch slipping. How to fix this issue is as follows:

1. Check Clutch Fluid:

Verify that the clutch fluid level is appropriate. Clutch engagement may be impacted by low fluid. Fill it up with the correct fluid if it’s low.

2. Modify Clutch Cable Or Hydraulic System:

Depending on the design of your car, you might need to modify the clutch cable or hydraulic system. Moreover, clutch engagement is properly ensured by suitable adjustment.

3. Inspect The Clutch Disc:

Slipping might be brought on by a worn-out or damaged clutch disc. Additionally, replace the release bearing, pressure plate, and clutch disc as necessary.

4. Inspect The Clutch Pedal:

Inadequate engagement may result from a worn-out or improperly set clutch pedal. However, the pedal can be adjusted or changed for smoother functioning.

5. Avoid Riding The Clutch:

While driving, resting your foot on the clutch pedal can lead to sliding and excessive wear. When you are not actively changing gears, keep your foot off the clutch pedal.

6. Professional Inspection:

Consult a mechanic if the sliding continues. Moreover, they can identify and fix more complicated problems like worn-out flywheels or broken pressure plates.

You can stop the clutch from slipping, enhance your driving, and make sure your car runs smoothly by taking care of these issues.

Conclusion:

In conclusion, addressing the clutch slipping issue requires prompt action. Proper diagnosis of the root cause, whether it’s due to wear, hydraulic problems, or improper adjustments, followed by appropriate repairs or replacements, will restore clutch functionality and ensure a smoother driving experience.

Now, that we’ve covered all the aspects of your query about what does slipping the clutch mean to a car. We hope the above-mentioned information will be helpful to all the viewers. Additionally, if anyone faces any doubts feel free to contact us. Thank you for reading!

How To Fix Catalytic Converter Smell? [Simple Tricks]

Drivers might smell an odour after having their catalytic converter updated. It is frequently compared to the smell of sulphur, rotten eggs, or burning plastic. For a while, this odour may be typical, but if it persists, it may indicate that there is still a problem. A bad smell coming from the catalytic converter in your car can be both unwelcome and alarming.

If you’re wondering about how to fix catalytic converter smell then, this article presents efficient solutions. To deal with this scent as well as insights into the causes of it. By being aware of the causes and putting these fixes into practice. You may wave goodbye to the unpleasant catalytic converter odour and ride more comfortably.

What Is The Catalytic Converter?

In order to reduce emissions, a catalytic converter is an essential component of the exhaust system in cars. Its goal is to lessen the amount of dangerous contaminants that the engine’s exhaust emissions leak into the environment. The catalytic converter converts dangerous molecules like carbon monoxide, nitrogen oxides, and unburned hydrocarbons into less dangerous ones like carbon dioxide, nitrogen, and water vapour through a sequence of chemical processes.

This procedure contributes to cleaner air and reduces pollution levels by reducing the detrimental effects of vehicle emissions on air quality and general environmental health.

Causes Behind Smelling Catalytic Converter

Before learning about how to fix catalytic converter smell. We need to dig into its actual causes. In the exhaust system of your car, the catalytic converter acts like a superhero. Prior to entering the atmosphere, it converts toxic gases that are released from the engine into less dangerous ones. However, this hero occasionally leaves behind an offensive odour. Let’s investigate why.

1. Unburned Fuel:

Pretend you’re cooking, but some of the meal doesn’t get done. Similarly to this, if fuel is not completely burned by the engine, some may end up in the catalytic converter. A foul odour may result from this.

2. Oil Leaks:

Oil is necessary for your car’s engine, and occasionally oil leaks into the exhaust system. The catalytic converter produces an unusual fragrance when this oil heats up.

3. Overheating:

If the engine heats up excessively, the catalytic converter may be harmed. This damage may cause melting inside the converter, which would result in a burning plastic-like odour.

4. Sulphur Compounds:

The sulphur in petrol can give off a “rotten egg” odour when it reacts with the converter. This odour could get worse if the fuel contains a lot of sulphur.

5. Contaminated Air Filters:

Filters that breathe air into your car are contaminated. Therefore, your engine may not receive enough air if these filters are dusty or clogged. This may result in an unusual-smelling combination in the exhaust.

Although the scent of a catalytic converter is usually not dangerous, it is nevertheless vital to pay attention. Strong or lingering odours indicate a problem that needs to be fixed.

Solutions On Smelling Catalytic Converter

It can be inconvenient to have a smelly catalytic converter in your automobile, but there are easy fixes available. A component of your car’s exhaust system that helps lower harmful emissions is the catalytic converter. As well as it may have unburned gasoline, oil leaks, overheating, sulphur compounds, or unclean air filters if it is emitting a strong odour.

Here are some options for eliminating the odour:

1. Check For Engine Problems:

The smell could be the result of engine issues like oil leaks or misfiring. Therefore, correcting these problems improves combustion and lessens the smell.

2. Catalytic Converter Replacement:

If your catalytic converter is really damaged, you might want to think about getting a new one. This frequently gets rid of the odour.

3. Utilise Clean Fuel:

Select high-quality fuel with less sulphur. The synthesis of chemicals that give off odours in the exhaust is decreased by cleaner fuel.

4. Clean Or Replace Dirty Air Filters:

Air filters should be cleaned or replaced since dirty air filters might impact the air-fuel ratio and cause odours. For appropriate airflow, clean them frequently or replace them.

5. Add Fuel Additives:

Fuel additives should be added since some of them can increase combustion performance while minimising odour. Seek out additives that are intended to lower emissions and enhance gasoline quality.

Remember that finding the ideal remedy for your particular circumstance may need a little amount of trial and error. It’s a good idea to speak with a qualified mechanic if the odour lingers or if you’re unsure of any measures. You may have a more enjoyable and comfortable driving experience while also ensuring your car runs effectively and cleanly by taking care of the stinking catalytic converter.

Frequently Asked Questions:

After learning about the reasons and solutions for smelling catalytic converters. Therefore, let us now see some FAQs to gain more insight into the topic.

1. A Catalytic Converter’s Odour Is It Harmful?

Ans. The odour is typically offensive but not hazardous. However, for optimum vehicle performance, it is advised to rectify it right away.

2. Can I Drive If I Smell Catalytic Converters?

Ans. Continuous exposure to the stench, while generally harmless for short drives, may point to more serious problems.

3. Should I Perform My Own Catalytic Converter Replacement?

Ans. To ensure correct installation and compliance with emissions laws, it’s best to leave catalytic converter replacement to a professional mechanic unless you have experience.

Conclusion:

It doesn’t have to bother you all the time when your automobile has a catalytic converter smell. You may make your driving environment smell nicer again by identifying the causes of the odour and applying these simple fixes. Now, that we’ve covered all the aspects of your query about how to fix catalytic converter smell from a car. We hope the above-mentioned information will be helpful to all the viewers. Additionally, if anyone faces any doubts feel free to contact us. Thank you for reading!

What Does A Broken Tire Belt Sound Like? [Solutions Explained]

When driving your car, have you ever heard any odd noises? It may be an indication of a broken tyre belt. Additionally, if you hear rhythmic or pounding noises that seem to correspond to the speed of your car. Understanding the sounds that worn tyres make. It will enable you to solve the issue before it has a significant impact on your driving experience. In this post, we’ll examine what does a broken tire belt sound like in your car. As well as we’ll let’s look into the causes of this problem, and some workable fixes to help you get it fixed and back on the road safely.

How Risky Is A Broken Tire Belt?

Before learning about what does a broken tire belt sound like. Let’s learn how risky a broken tire will be in your car. You should never operate a vehicle with exposed tyre belts since the danger does not get any greater than this. A broken belt can harm your car and everyone nearby because it is essentially a time bomb that is about to explode.

Furthermore, if something occurs while travelling at a highway speed, it can even have disastrous consequences such as:

1. Control Loss:

Your automobile may tremble or shake if you have a damaged tyre belt. This might make it challenging to steer correctly, which makes driving your car challenging.

2. Blowouts:

The tyre could blow out while you’re driving if the damaged belt creates a weak area in it. An abrupt blowout like this might cause a loss of control and accidents.

3. Disparate Wear:

Uneven tyre wear can result from a broken tyre belt. It becomes more difficult to stop fast as a result of the uneven wear on the tire’s surface.

4. Tyre Defect:

If the broken belt is not fixed, further harm may result. The tyre could eventually stop functioning altogether, leaving you stranded or resulting in an accident.

Reasons Behind A Broken Tire Belt?

Unusual noises made while driving your car can indicate further problems. The sound of a damaged tyre belt is one such issue because it might affect your car’s performance and safety. Investigate the causes of this sound and how to stop it for a smoother ride.

1. Tyre Belt Separation:

Steel wires and layers of rubber are found inside your tyre. Sometimes, these layers begin to separate, causing the tyre to wobble and make thumping noises as you drive.

2. Impact Damage:

Your tyre may become damaged if you strike potholes, curbs or other objects on the road. The interior of the tyre may crack as a result of this damage, creating noises that correspond to the speed of your car.

3. Under- Or Over-Inflation:

Your tyre may become stressed if it doesn’t have the proper pressure. As you drive, this stress may cause internal tyre damage and unusual noises.

4. Wear and Age:

Your tyres age and deteriorate over time. They can become damaged by the sun, rain, and heavy use. The tyre layers may split if they are weak, which will produce strange noises.

You can better comprehend why your car generates certain noises by becoming aware of these causes. Your trip can remain smooth and safe if you pay close attention and deal with the problem right away.

What Does A Broken Tire Belt Sound Like?

Imagine being on the road and noticing strange noises coming from your car all of a sudden. A broken tyre belt may be audible if you hear a thumping or rhythmic sound that corresponds to the speed of your car. Let’s examine what these noises signify and their causes.

1. Bumping Or Thumping:

A tire’s belt breaks, causing the tyre to become uneven. The damaged component makes a distinct pounding sound inside the automobile as it strikes the road.

2. Riffling Noise:

Every rotation of the tyre results in a wobble due to the broken belt. With each rise in speed, this wobbling creates a repetitive noise that gets louder.

3. Moving Quicker:

As you drive more quickly, the noise typically becomes more audible. It sounds like a constant “thump-thump-thump” that changes tempo with your movement.

4. Turns And Changes:

When you turn the steering wheel, the sound may alter if the broken belt is in one of the front tyres. This occurs as a result of changes in the tire’s surface contact with the road during turns.

5. Lower Speeds With Less Noise:

Interestingly, at slower speeds, the noise might not be as loud. It frequently stands out the most on roads or when you’re moving along at a steady speed.

6. It Sounds Like It’s Coming From A Particular Location:

Take note of the direction the sound appears to be coming from. You might be able to identify which tyre is making the noise if a tyre belt is damaged.

You can spot a broken tyre belt early on if you can identify these distinct sounds. To protect your safety on the road, it is a good idea to have your tyres checked by a professional if you hear any of these noises.

How To Fix A Broken Tire Belt?

Although hearing a broken tyre belt noise in your car can be unsettling, there are workable remedies available. You can make driving safer and easier by being aware of these solutions. Let’s look at how to repair a noisy tyre belt.

1. Examine The TIres:

Check each tire’s surface closely for any obvious signs of wear, such as bulges, lumps or uneven wear. These warning indicators suggest a broken tyre belt and necessitate prompt action.

2. TIre Pressure Check:

Make sure that all of your tyres are inflated to the specifications listed in your vehicle’s manual. Problems with belt separation might be made worse by improper tyre pressure.

3. Tyre Rotation And Balancing:

To balance out wear patterns, rotate your tyres regularly. Balancing makes ensuring that weight is distributed evenly, which lessens the stress on the tyre belts and increases their durability.

4. Change A Damaged TIre:

It’s critical to change a tire’s belt if you notice one has a broken belt. It is not possible to replace a broken tyre belt because they are essential for preserving tyre stability and structure.

You may easily deal with the broken tyre belt noise in your car by following these procedures. To ensure a safe and enjoyable driving experience, keep in mind that tyre problems affect your vehicle’s overall performance and safety.

Conclusion:

You can avoid dangers on the road by learning what does a broken tire belt sound like. You can make driving easier and safer by being aware of the causes of this problem and learning how to fix it right away. We hope that the above-mentioned information will be helpful to all the viewers. Additionally, if anyone faces any doubts feel free to contact us. Thank you for reading.

What Causes A Brand New Alternator To Go Bad? [Reasons Explained]

The electrical system of a car is reliable with a new alternator. Nevertheless, it might be puzzling and distressing when a brand-new alternator breaks down too soon. The alternator, which generates power to charge the battery and give electricity to various systems, is an essential part of modern automobiles because they rely heavily on electrical systems. This article explores what causes a brand new alternator to go bad and offers advice on fixing the problem to keep your car running efficiently.

Explain What Causes A Brand New Alternator To Go Bad?

You’ve just installed a brand-new alternator in your car in the hopes that the electrical system would generate reliable electricity. The sudden failure of this new alternator, nevertheless, can be annoying. Here are some reasons behind the cause:

1. Errors In Manufacturing:

Even though manufacturers inspect their products, occasionally a few alternators may be defective from the start. These mistakes might lead to issues and hasten the deterioration of the new alternator.

2. Voltage Spikes:

Imagine for a moment that the electricity in your home suddenly becomes substantially stronger. The electrical system of an automobile is also susceptible to this. These powerful electrical surges have the potential to damage the alternator and cause it to malfunction.

3. Belt Problems:

When the engine is running, the alternator is assisted by a belt. The alternator can be under stress if this belt is worn out, too tight, or too loose. Even if it is brand new, this tension may cause damage.

4. Unreliable Electrical Connections:

Numerous little wires transport power throughout the engine of the car. The electricity cannot flow freely if these wires are rusted or loosely connected. This may weaken and impair the performance of the replacement alternator.

5. Abnormal Heat:

If the engine of your car faces severe heat. This can occur if you drive for a lengthy period or in extremely hot conditions. The new alternator can malfunction if the heat becomes too intense for it to manage.

6. Inadequate Installation:

If you don’t connect the new alternator correctly or position the components around it properly, the alternator can’t do its job well and might stop working soon.

Knowing these causes and maintaining your vehicle’s electrical system will help you avoid a new alternator failing. Your alternator can run well for a very long period with regular inspections, proper installation, and early problem-solving.

What To Do If Alternator Goes Bad?

After learning about what causes a brand new alternator to go bad in your car. Now, let’s discover how to fix the cause by following these simple steps.

1. Diagnosis:

First, ascertain the root of the issue. Look for any problems, such as frayed wires or damaged belts. This will assist you in determining the cause of the new alternator’s malfunction.

2. Replacement:

Get in touch with the vendor if the new alternator has a manufacturing issue. Given that it’s still brand new, they might replace it without charge. Keep a copy of your warranty information close to hand.

3. Belt Check:

Examine the belt that runs from the engine to the alternator. Additionally, replace or adjust it if it is worn out, too tight, or too loose. The alternator operates more efficiently with adequate belt tension.

4. Examining The Connection:

All of the electrical connections near the alternator should be cleaned and tightened. As a result, the new alternator runs more efficiently and effectively.

5. Controlling The temperature:

Check the temperature in your car. The alternator may suffer if it becomes overheated. Any cooling system problems should be fixed, and prolonged driving in excessively hot weather should be avoided.

6. Expert Installation:

If you’re unsure, additionally, ask a knowledgeable mechanic for assistance in installing the alternator properly. They know how to do it correctly, avoiding installation errors that could harm the new alternator.

You can boost the likelihood that your brand-new alternator will function correctly once again by following these instructions. Your car’s electrical system will stay in good shape with regular inspections and appropriate maintenance.

Frequently Asked Questions:

Let us now delve into some amazing frequently asked questions to gain more insights about the topic in detail.

1. Can A Faulty Battery Harm A Brand-new Alternator?

Ans. Yes, an insufficient or damaged battery may put undue strain on the alternator, possibly resulting in an early failure.

2. What Symptoms Indicate An Alternator Is Failing?

Ans. Headlights that are dimming, dashboard warning lights, unusual noises, and a dead battery are all typical symptoms.

3. What Is The Expected Lifespan Of A New Alternator?

Ans. The lifespan of an alternator might vary from 7 to 10 years while it is operating well due to several factors.

4. Can I Swap Out The Alternator Myself?

Ans. You can change the alternator yourself if you have the right equipment and knowledge. For a precise diagnosis and thorough installation, a professional installation is advised.

5. How Can I Avoid Problems With My Alternator?

Ans. Preventing alternator troubles and extending its lifespan can be achieved through routine maintenance, good installation, and timely resolution of electrical faults.

Conclusion:

While annoying, a brand-new alternator going bad can be caused by several things, including poor installation or manufacturing flaws. Car owners can increase the lifespan of their alternators and take advantage of a dependable and effective vehicle by being aware of these probable causes and taking preventive action to avoid them. If you’re still wondering what causes a brand new alternator to go bad in your car. Please refer to the article in detail.

Now, that we’ve covered all the aspects of your query. We hope the above-mentioned information will be helpful to all the viewers. Additionally, if anyone faces any doubts feel free to contact us. Thank you for reading.

How To Tell If Tire Is Flat Or Just Needs Air? [Explained]

Imagine getting in your car to go for a drive and realising something doesn’t feel quite right about the tyres. Is the tyre flat or merely in need of air? It’s crucial to distinguish between the two for both your safety and the health of your car. We’ll walk you through the process of determining how to tell if tire is flat or just needs air in this post, arming you with the knowledge you need to confidently manage these circumstances.

If you want to know whether your tires are flat or simply need air, there are a few warning indicators that can assist you. The sidewall of a flat tire will be considerably thinner than the rest of the tire. On the sidewall, there will also be a noticeable bulge. You can drive the automobile and if the steering feels difficult, you probably have a flat tire. The tire is not always flat when it is deflated. The tire may occasionally only require air. In such cases, there won’t be a noticeable bulge and the sidewall won’t be much lower than the remainder of the tire.

Explain The Difference Between Flat Tire And Deflated Tire

Although they may sound similar, a flat tire and a deflated tire are two distinct problems that can affect your car’s performance and safety. Here is a difference between the two:

Flat Tire:

  • There is no air pressure left in a flat tire.
  • It may appear as though it is touching the ground because of the obvious drooping.
  • Driving with a flat tire is dangerous since you have less control and the tire and rim could get damaged.

Deflated Tire:

  • While not entirely flat, a deflated tire has less air pressure than it should.
  • Although not noticeably so, it can appear slightly flatter than the other tires.
  • Driving on a deflated tire can lead to inefficient fuel use, uneven tire wear and challenging vehicle handling.

In both situations, it’s critical to act quickly to resolve the situation. If you have a flat tire, you should probably change it or get help. You can fill up a tire at a petrol station to the recommended pressure if it is deflated. To avoid both flat tires and deflated tires and to guarantee a safe and comfortable ride, routine tire inspections and maintenance are essential.

How To Tell If Tire Is Flat Or Just Needs Air? [Explained]

Your car’s tires, which keep you travelling without a hitch, are its unsung heroes. However, what occurs if they’re not feeling their best? Does the tire need to be repaired or is it simply deflated? Don’t worry! we’ve you covered. To ensure your safety and a comfortable ride, we’ll explain the signals and provide you with easy procedures to evaluate whether your tyre is flat or requires air.

1. Visual Examination:

The first hint is frequently right in front of you. Look at your tire closely:

  • Flat Tyre:

The tire is probably flat if it appears to be drooping, touching the ground or bulging unusually.

  • Needs Air:

If the tire appears slightly underinflated but not noticeably so, it may only want some air.

2. Check Tire Pressure:

Take a tire pressure gauge and do the following:

  • Flat Tire:

Your tire is probably flat if the pressure reading is much below the recommended level.

  • Needs Air:

Your tire needs air but isn’t completely flat if the pressure reading is only a little bit below the required level.

3. Listening To Sounds:

Your car occasionally provides audio cues:

  • Flat Tire:

Your flat tire may be impacting the road unevenly if you hear pounding or flapping sounds while driving.

  • Needs Air:

A tire in need of air won’t typically generate these distinctive noises.

4. Controlling And Steering

Keep an eye on how your vehicle handles:

  • Flat Tire:

If one of your tires is flat, it may feel difficult or slow to turn and your vehicle may pull to one side.

  • Needs Air:

Low tire pressure may not significantly influence your steering or the steadiness of your vehicle.

What Are The Causes Of Flat Tires?

After learning about the difference between flat and deflated tires and how to tell if tire is flat or just needs air. Now, let’s learn about its causes. Thereby, to avoid flat tires, it’s crucial to routinely inspect your tires for signs of wear or low pressure. Unexpected flat tires might leave you stuck on the side of the road. A flat tire can occur for various common reasons, including:

1. Puncture:

Sharp things, such as nails, screws, or glass shards, can cause the tire to be punctured, allowing air to escape.

2. Damaged Valve Stem:

Your tire is inflated from the valve stem. Air may gradually leak out if it is damaged or has a leak.

3. Tire Bead Leak:

The tire bead serves as the rim’s sealant. Air may slowly leak out if it is damaged or not adequately sealed.

4. Worn Tread:

A tire’s tread may become worn over time, increasing its susceptibility to leaks and punctures.

5. Age And Wear:

Tires lose air as they get older because they are more prone to cracks and leaks.

Therefore, unexpected flats can be prevented by maintaining sufficient tire pressure, avoiding road hazards, and taking care of any problems right away.

What Are The Causes Of Deflated Tires?

Reduced fuel efficiency, poor handling, higher tire wear, and even the possibility of blowouts can all be consequences of underinflated tires.  Underinflated or deflated tires can impair your driving comfort and a vehicle’s performance. Tires can lose air pressure for several reasons:

1. Leakage:

Nail, screw, or other sharp item punctures can result in slow leaks. The valve stem, which connects the tire to the air source, is another area where leaks might form.

2. Temperature Variations:

In colder climates, the air inside tires contracts, resulting in a reduction in tyre pressure. Seasonal pressure variations are frequently caused by this.

3. Natural Air Loss:

All tires naturally lose a little quantity of air over time. If not consistently checked and fixed, this gradual air loss might cause underinflated tires.

4. Tire Wear:

As tires deteriorate, leaks and air loss increase. Damage is more prone to occur to worn-out treads.

5. Valve Stem Issues:

Air leaks can be caused by faulty or damaged valve stems. For maintaining optimum air pressure, these stems are essential.

Therefore, deflated tire problems can be avoided with routine tire pressure checks and maintenance, making driving safer and more comfortable.

How To Fix Flat Or Deflated Tires?

Your safety and the performance of your car depend on you fixing a flat tyre or a deflated tyre. Here is how to handle both problems:

1. Fix A Flat Tire:

These instructions will help you safely get back on the road if you find yourself with a flat tire. Pull over first in a level, safe location away from traffic. Put your car in park and activate your hazard lights. Open the trunk and take out the car jack, lug wrench, and spare tire. The lug nuts should be gently loosened but not taken off. Make sure the automobile is stable as you lift it off the ground using the car jack. Remove the flat tire after completing the lug nut removal.

Aligning the lug holes, replace them with the spare tire. As much as you can, hand-tighten the lug nuts. Use the jack to lower the car again, then take the jack out. Finally, crisscross the lug nuts with the lug wrench to ensure that they are completely tight. Before going to a repair shop to mend or replace the flat tyre, check the spare tire’s air pressure.

2. Fix A Deflated Tire:

You can usually fix a slightly underinflated tire without replacing it. Put the warning lights on and park your car in a secure location. To check the tire’s pressure, use a tire pressure gauge. You can re-inflate it at a petrol station if it is below the advised level. For information on the recommended tire pressure, consult the owner’s manual or the sticker on the driver’s side door.

The air hose should be connected to the tire’s valve stem. Fill the tire with air until the pressure is at an acceptable level. After a few days, recheck the tire’s pressure to make sure it’s holding air properly. It’s wise to check the tire for leaks or damage if you detect regular pressure decrease.

Therefore, prioritising safety and appropriate tire maintenance is essential in both situations. To make sure your vehicle’s tires are in top shape, seek assistance from a qualified mechanic if you are uncomfortable changing a flat tire or if the deflation keeps happening.

Conclusion:

You may avoid wasting time, money, and stress by learning how to tell if tire is flat or just needs air. Simple air-top-ups or quickly fixing a flat tire both contribute to your safety and a more comfortable ride. You can actively ensure that your tires continue to move you forward without a hitch by remaining vigilant and implementing precautionary measures.

Now, that we’ve covered all the aspects of your query. We hope the above-mentioned information will be helpful to all the viewers. Additionally, if anyone faces any doubts feel free to contact us. Thank you for reading!

What Causes Lug Nuts To Loosen? [Explained]

You need despite their diminutive size, lug nuts are essential for maintaining the safety of the wheels of your car. The wheels are held in place by these inconspicuous rivets, guaranteeing secure transportation. But occasionally, lug nuts can go loose and pose a major threat to your safety. Maintaining the integrity of your car requires an understanding of the causes of this phenomenon.

In this post, we’ll examine what are the lug nuts, what causes lug nuts to loosen as well as any potential risks connected to this problem. Understanding these issues will enable you to take preventive action and make sure your trips are safe and easy.

What Are The Lug Nuts In Car?

Before learning about what causes lug nuts to loosen in your car. Let’s delve into its introduction part first. Although lug nuts may appear complicated, they are essentially straightforward but essential pieces of your vehicle. Think of them as the “locks” that firmly anchor your wheels. The wheel is fastened to the car’s hub by threading these little, spherical components onto the wheel bolts. They significantly contribute to your driving safety.

The power of the engine causes your wheels to spin when you ride. Your wheels can just roll away if you don’t have lug nuts! To ensure that the wheels remain in their proper locations, they are tightened onto the bolts. A particular tool called a wrench is frequently used to tighten lug nuts, and they must be just the correct amount of tight—neither too loose nor too tight.

Keep in mind that these seemingly insignificant lug nuts are like the sturdy arms keeping your wheels steady while you drive. Don’t forget to recognise the significance of these unsung warriors who keep you and your wheels in place anytime you consider your car’s wheels.

What Causes Lug Nuts To Loosen?

The lug nuts on your car’s wheels are crucial parts that keep them secure. They can occasionally become unsecured, which poses a threat to safety. Let’s look at the causes of lug nut loosening and how to avoid this problem.

1. Motion And Vibration:

Your automobile experiences vibrations and bumps while you’re driving, which over time may cause lug nuts to become loose.

2. Insufficient Torque:

When lug nuts aren’t properly torqued (tightened), they can come undone while you’re driving.

3. Rust And Corrosion:

The connection between the wheel and the lug nut becomes weaker and loosens as a result of rust and corrosion-induced gaps.

HOLD ON TO YOUR NUTS! Preventing Wheel-Offs On Trucks and Buses

4. Drive-Related Stress:

Regular starts stops and turns put strain on the lug nuts, which causes them to gradually loosen.

5. Issues With Wheel Alignment:

Additionally, uneven pressure from bad wheel alignment might make lug nuts more likely to come away.

Take precautions to keep your lug nuts securely fastened, reducing the possibility of mishaps or wheel detachment. The stability of your car’s wheels and your safety on the road may be preserved with routine maintenance, appropriate torque application, and taking care of any alignment or rust issues.

How To Fix The Loosen Lug Nuts?

If you’ve observed that the lug nuts on your automobile are starting to come loose, you need to take immediate action to protect your safety while driving. An instruction manual for solving the lug nut loosening issue is provided below:

Step 1: Collect The Required Tools

Make sure you have the following equipment available before you start: Torque wrench, Lug wrench, Anti-seize lubricant (Optional)

Step 2: Secure Parking

Look for a level and a safe place to park your vehicle. Moreover, make sure the automobile is in gear (or “Park” for automatic transmissions) and the parking brake is applied.

Step 3: Lift The Car

Carefully lift the automobile off the ground if you have a jack and jack stands. Moreover, make sure you adhere to the correct lifting techniques described in your vehicle’s manual.

Step 4: Remove The Lug Nuts

Carefully remove each lug nut from one wheel using the lug wrench. As well as put them in a secure location.

Step 5: Examine The Hub And Threads

Therefore, look for any indications of corrosion, damage, or debris in the hub and the threads of the wheel bolts. Just clean them.

Step 6: Apply Lubricant (Optional)

If available, apply a tiny amount of anti-seize oil to the threads of the wheel bolts. This can make tightening simpler and help stop further corrosion.

Step 7: Tighten Lug Nuts

Tighten the lug nuts in a crisscross fashion using the torque wrench. As well as observe the torque recommendations listed in your vehicle’s owner’s manual. Therefore, this guarantees even and accurate tightening.

Step 8: Lower The Car

By using the jack and jack stands, additionally, lower the car back to the ground.

Step 9: Double-Check The Lug Nuts

Recheck the lug nut tightness with the torque wrench once the car is on the ground. Just check tightening to the recommended torque.

Step 10: Repeat For Other Wheels

If you have found other wheels with loose lug nuts, carry out the same procedure for each one.

Step 11: Professional Inspection (Optional)

Therefore, it is advised to seek the advice of a qualified mechanic if you have any questions about any part of this procedure or if the problem continues. They can check the hub, nuts and wheels for any hidden problems.

These techniques will help you resolve the lug nut loosening problem and guarantee that your wheels are firmly fastened, making driving safer. To avoid this issue in the future, routine maintenance and precise torque application are essential.

Frequently Asked Questions (FAQs):

Till now, we’ve covered all the aspects of the lug nuts. Now, we’ll look after some FAQs to gain more insight into the topic.

1. How Frequently Should I Check The Tension Of My Lug Nuts?

Ans. Checking them before and after any tire-related work is a good idea.

2. When Tightening Lug Nuts, Can I Use A Standard Wrench?

Ans. A torque wrench should be used if at all possible, to ensure adequate torque levels.

3. What Should I Do If I Discover A Lug Nut Is Loose While Driving?

Ans. You need to stop right away and deal with the problem. If you have a torque wrench, use it to tighten the lug nut to the proper torque. If not, get assistance from a professional.

Conclusion:

Although lug nuts may appear to be minor parts, they play a crucial part in keeping your wheels in place. You can take precautions if you are aware of the reasons why lug nuts loosen. You may prevent dangerous circumstances on the road by doing routine maintenance, using the right torque, and paying attention to detail. Keep in mind that the security of your car and everyone else on the road depends on the tightening and maintenance of those lug nuts.

Now, that we’ve covered all the aspects of the lug nuts, what causes lug nuts to loosen, how to fix them, FAQs. We hope the above-mentioned information will be helpful to all the viewers. Additionally, if anyone faces any doubts feel free to contact us. Thank you for reading.